The FABULOUS Miss Ginger Grant!

The FABULOUS Miss Ginger Grant!
Click here to dig through my stuff!

Miss Ginger's FABULOUS Things!

NEW!!! Visit my online store for your chance to buy all things Ginger!

Search Miss Ginger's FABULOUS World!

Custom Search

Translate

Showing posts with label crafts. Show all posts

Saturday, November 11, 2017

Fall Crafts for Free!

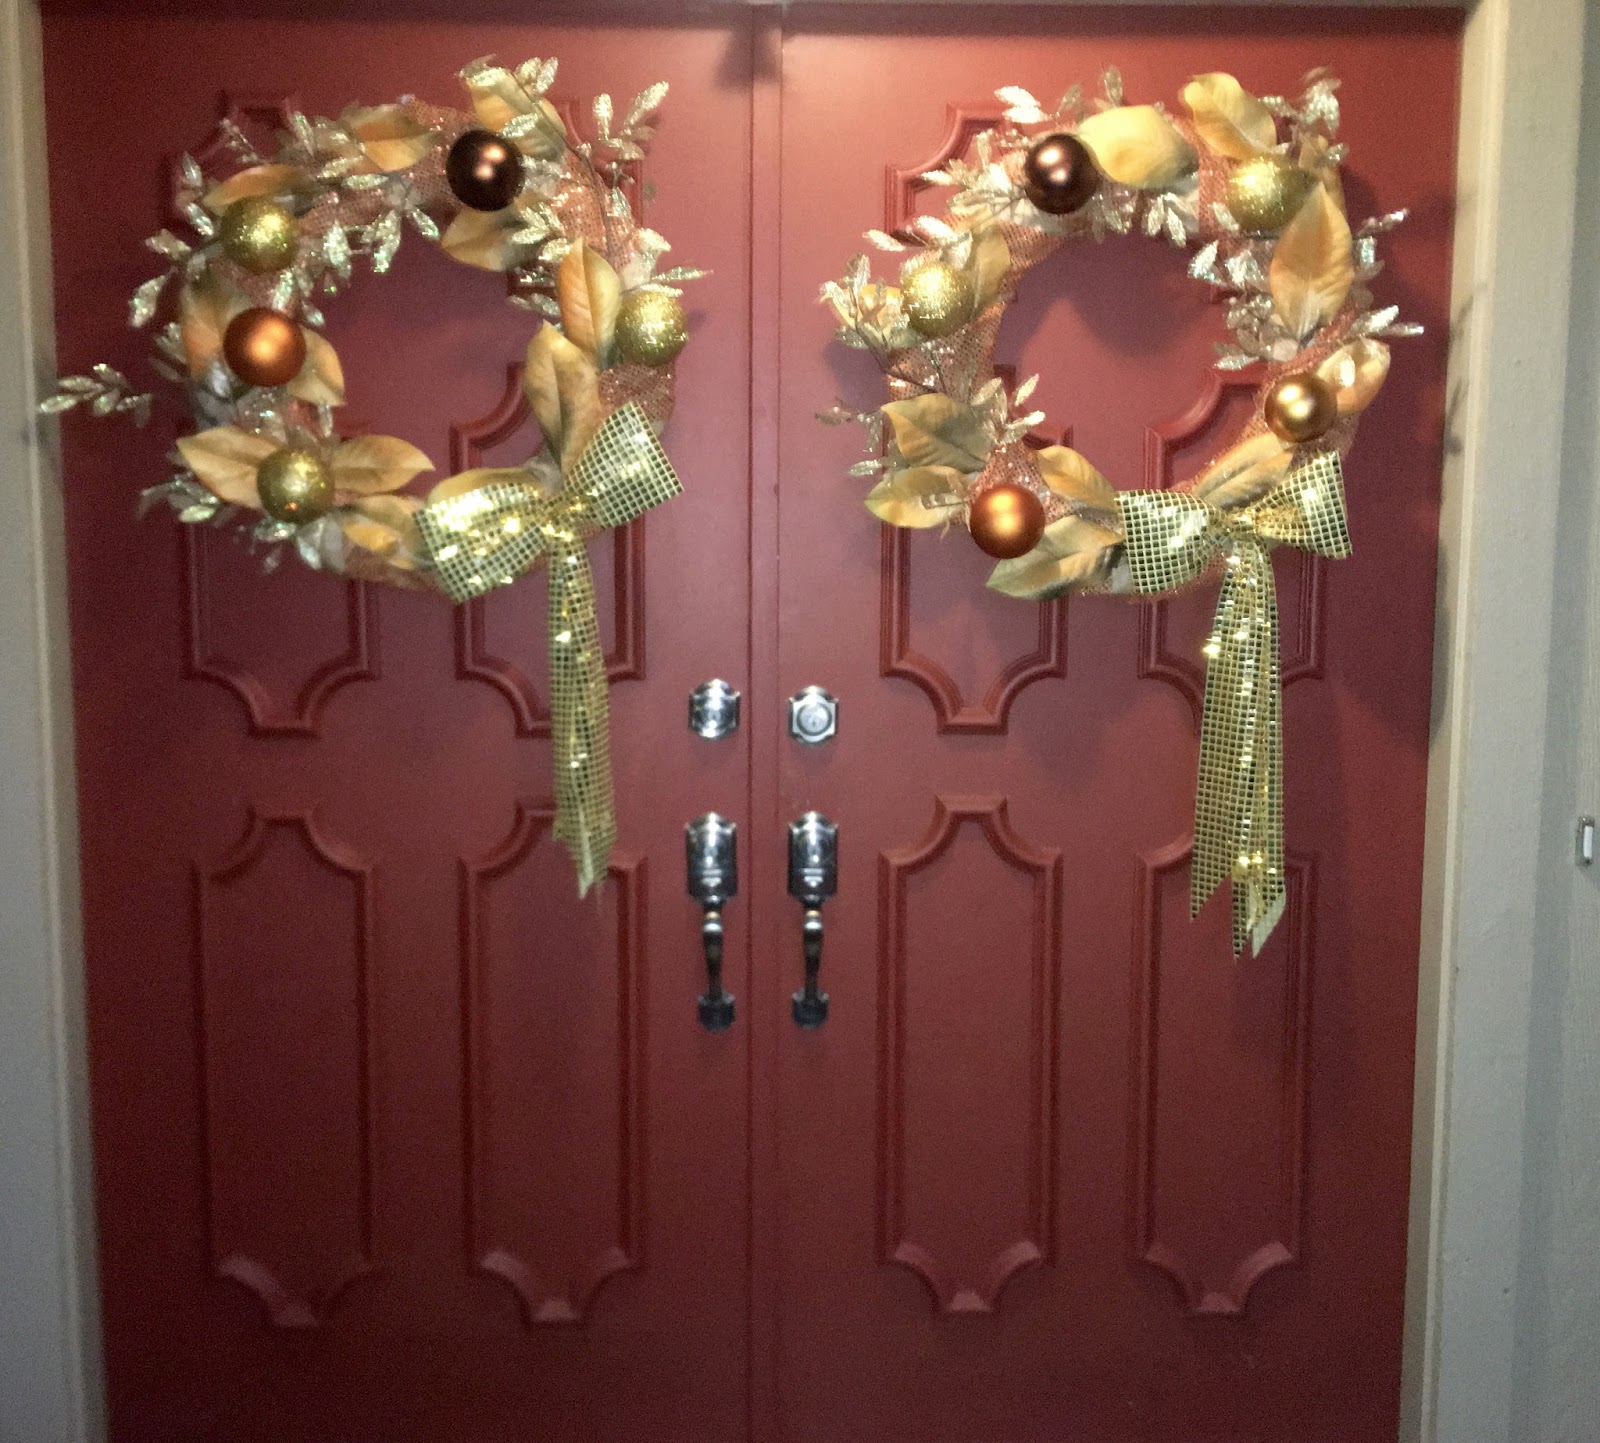
Miss Ginger made these fall holiday wreaths for the entrance to La Riata, and she's so proud of them she wanted to share them with you!  They were easy to make, and best of all, they were FREE!  Not one single trip to the craft store!  It's all made from crap she had around the house!  You can do it, too, with a little resourcefulness and creativity! 

She started by making her wreath bases from some styrofoam sheets that came as packing material from a piece of furniture.  Styro wreaths at the craft store are SO expensive, but with a an inexpensive styrofoam cutter you can make them yourself from garbage!  Miss G taped 2 pieces together to make a wreath large enough for her door.


 For the next step Miss Ginger used brown craft paper, which she had in the garage in a perfect 9" width designed to fit a paint masking device that she can no longer find, but you could cut regular craft paper into strips... This would be a great use for all of that brown paper Amazon.com uses to pack all that stuff you buy from them, since you're going to crumple it up anyway! 


Begin by creating a double ring of crumpled paper on top of the styrofoam, using tape as needed to keep it in place. Then, begin wrapping the styrofoam and paper together with more crumpled paper to create the base of the wreath. 


When you're done it will look sort of like a paper coffee cake, as observed here by Miss Ginger's assistant, LittleRed Corvette, himself an expert in fall colorations! 


Miss Ginger didn't have any fall-hued ribbon to use as garland, but she did have miles of orange glitter-dot fabric left over from some ancient costume, so she sliced it into strips with a rotary cutter and put it to use! 


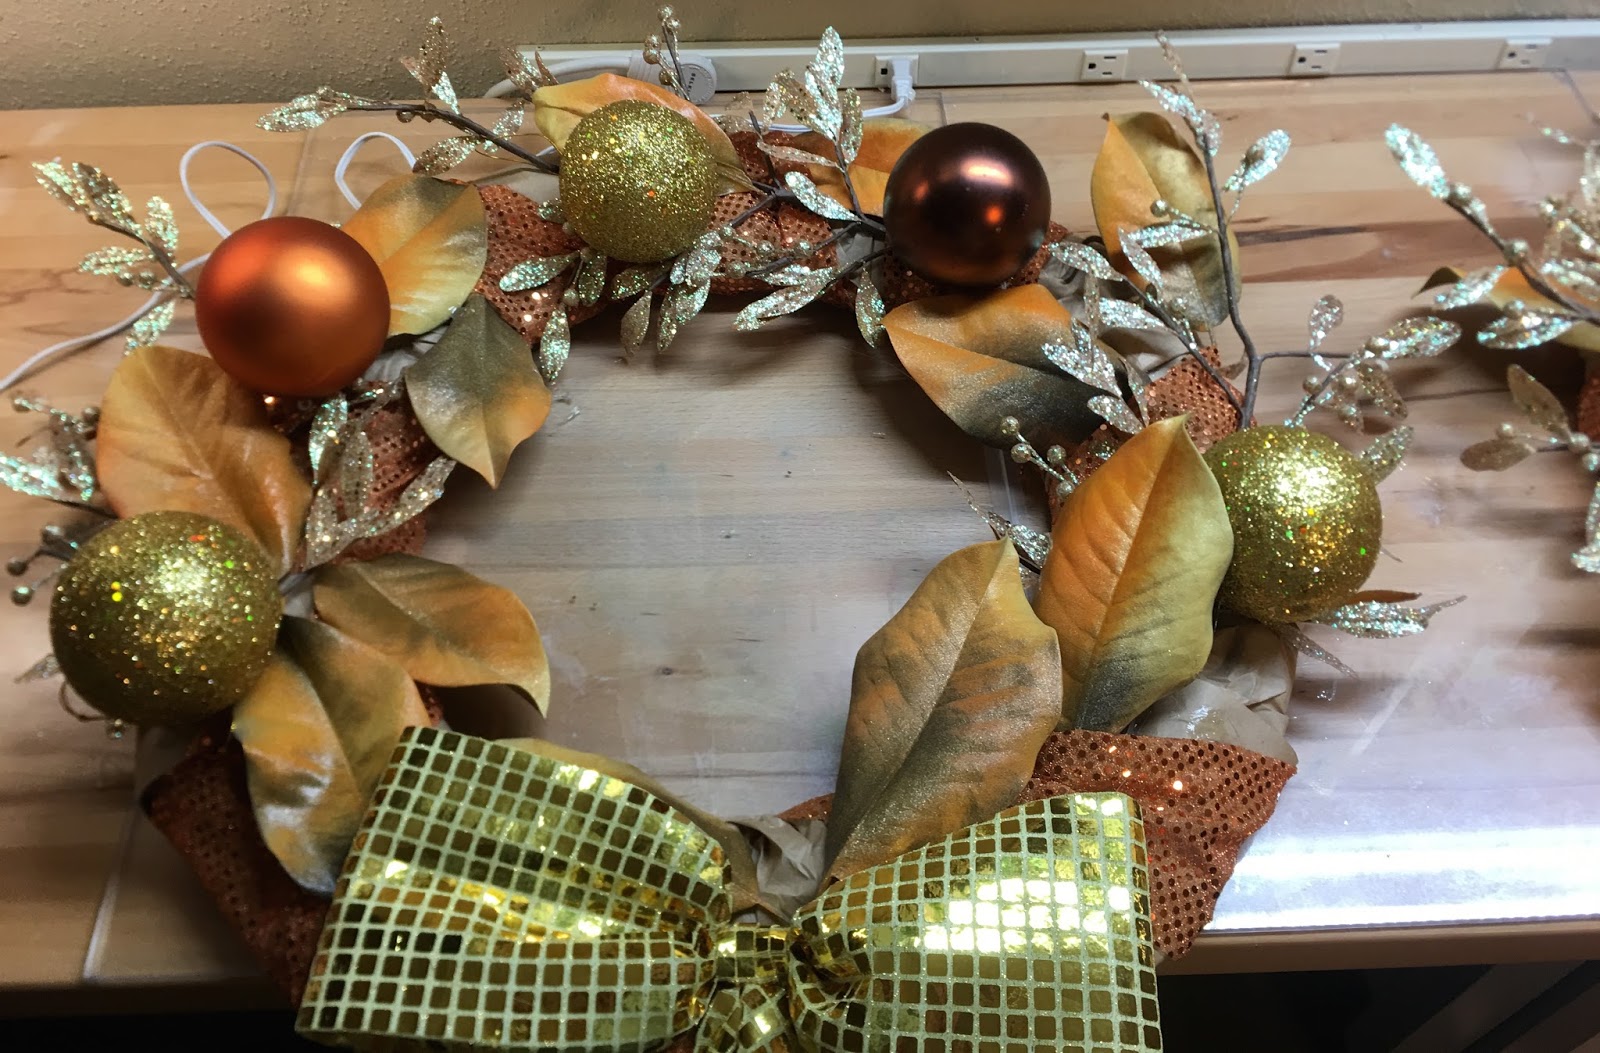
To make the bow she used more glitter dot in a different color, and wrapped it around a 5x10 piece of interfacing to give it body... you could use a sheet of paper if you don't have interfacing laying around.  She wrapped 4 pieces in total: one for each loop of the 2 bows. 

To shape the loops, she folded them wrong sides together, then gathered and stapled each loop.

Next, the 2 loops are stapled together... 


... a loop is created and wrapped around the connection to simulate a "knot"...

... and 2 more lengths of ribbon are added to create the tails.


Now the fun part:  decorating your wreaths!  Here's a little tip:  if you are making a pair of wreaths that will be shown together (like these double doors) then work on them together to make sure they balance.  You won't make them match completely, but you want to make sure they have the same density of elements so the will go together.  Miss Ginger likes to lay out all of her gee-gaw for both wreaths before she attaches anything,so she can make sure she's happy with the balance.

Miss Ginger used 3 elements on this wreath:  dried magnolia leaves from the yard that she sprayed with fall-colored spray paints, some glitter branch thingies left from an old christmas tree theme, and some gold plastic balls left over probably from the same tree. Use whatever you have, and if it's not the right color, spray it!  Pine cones, dried branches, old scratched ornaments... almost anything can be dolled up with some spray paint and some glitter! 

Once the layout was finalized, it took no time to hot-glue everything in place!  Miss G added greening pins to connect the heavier items directly to the styrofoam, but you could cut some paper clips into "u's" if you don't have greening pins.  Glue another pin or clip onto the back of each wreath for a hanger and you're ready to deck your halls with a gorgeous wreath made of trash!  


SaveSave

Monday, November 4, 2013

Basic Skills: Stencils

Stencils are what allow Miss Ginger to be an artist.... trust, honey, this bitch can't draw a straight line, much less a shape that looks like anything other than a blob! Those of you as "advanced in age" as Miss G may remember the manila stencils we used to buy at the dime store whenever we had to make posters  for school.  You held them against the poster board, and traced within them with a pencil or crayon, and it made all of your lettering look like it was cargo from overseas! 


While you can now find plastic stencils at many craft stores, you are limited to the designs that are available, and these stencils still have the basic problem that has plagued reusable stencils since the beginning of time:  "floating" negative space has to be connected with a void, causing that "stencilly" look that says "8th grade poster from the 70's!" 

Every modern craft room today has some sort of "die cutter" to make hearts and flowers out of all sorts of sheet goods making scrapbooks pop and cards extra-special. If you don't have one, flip over to amazon.com and order one right now!  I'll wait....

Seriously, if you don't have one, follow this link to Miss Ginger's Consumer Product Review.  You need one, so you might as well know what you are shopping for! Once you get it, you will want to know how to use it to make stencils.


Using the software included with the machine, Miss Ginger selects the design she wants to stencil, and downloads it over the internet. Once she has the file, she can resize it, flip it, rotate it, duplicate it, stretch it, etc.... until she has exactly what she wants.


With the design manipulated to her liking, Miss G loads the vinyl into the machine and cuts the stencil.
Once the stencil is cut, she removes the part of the design she doesn't want; a process we call "weeding."  By weeding away the actual design, she leaves a stencil to create a "positive" image on her material.  She could, conversely, weed away the surrounding material, leaving the shape as a "mask" to create a "negative" image on her final work.  If you're confused (I am!) it will make more sense in a minute! 


Once the stencil is weeded, Miss Ginger applies transfer paper on top of the stencil.  Sometimes called "flypaper," the transfer paper comes in a roll like a huge roll of masking tape, and it is designed to stick best to the vinyl material without damaging it. It also sticks veraciously to itself, so be careful! Once the flypaper is in place, use a brayer or the edge of a credit card to smooth out wrinkles and activate the adhesive.


Now you can flip the stencil over and peel the backing paper away from the vinyl, because the transfer paper will keep all of the vinyl in place.  With the adhesive exposed, the stencil can be applied to the object you are decorating.  What can one stencil with this technique?

I'm so glad you asked! 


Here, Miss Ginger stenciled the fleur-de-lis onto a glass bottle to create her wind chime. With the stencil in place, she used a rotary tool with a diamond bit to abrade the design.  Because the stencil is completely waterproof, you can also use it with etching cream to create more delicate designs on glass. 


You can use glass paint to create a stained-glass effect....

  ....or stencil with paint onto wood, metal, or other materials to create signs or other decor.  You can even stencil directly onto walls, mirrors, and windows to give your home a custom look! 


Once your image is complete, just peel away then stencil and your done!  Here are a couple of hints from Miss Ginger to help you along:

1.  Test the adhesive on an inconspicuous piece of your material before applying your stencil.  The adhesive on the vinyl may be too aggressive for some painted surfaces, and my remove the paint when you pull it away.  If your surface fails the adhesive test, try cutting your stencil out of stiff paper, and spray it with repositionable adhesive on the back. This extra step should allow you to apply and remove the stencil without damaging the surface. 
2.  When stenciling with paint, remove the stencil while the paint is still wet.  This will prevent the stencil from lifting the paint film, creating a jagged edge. 
3.  On glass, you may need to use a razor blade to scrape the vinyl away from detailed images.  The vinyl sticks pretty aggressively to glass. If this won't work with your application, use paper and spray adhesive. 

Have fun, and please leave a comment with links to your most creative endeavors! 


Sunday, November 3, 2013

Miss Ginger's Consumer Product Review®: Silhouette Cameo Cutting Machine

Shortly after man discovered fire, he invented the personal computer, which he found rather worthless until he invented a machine to make it print. 
From that point forward, history advanced rapidly as the computer-attached-to-a-typewriter was replaced by dot matrices, lasers, and all sorts of ink-spraying contraptions that we now call "printers".  


Once the typewriter had been obliterated from the desks of happy secretaries everywhere, mankind took aim at the venerable "scissors", and created the "knife plotter" to slice paper, vinyl, and just about anything else that comes on a roll with digital accuracy.  Of course, like all new computer technology, these things were huge and expensive. (Cue cheesy infomercial music:)  
"Until now!" 


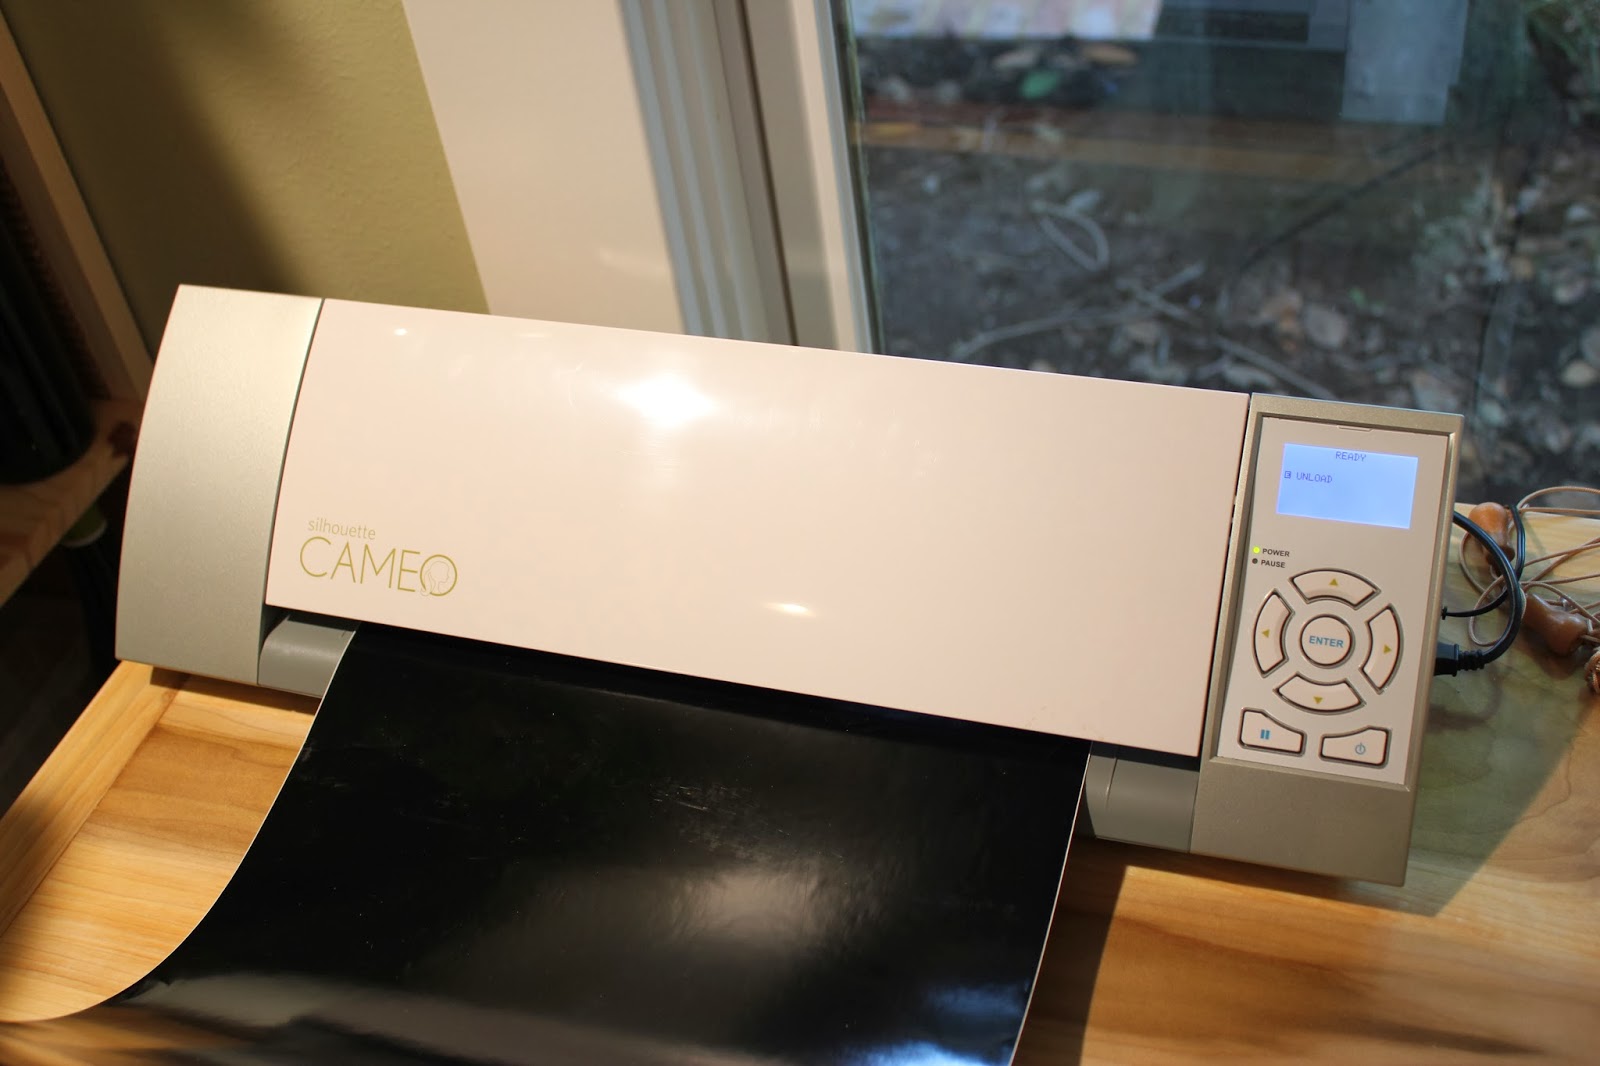
The Silhouette Cameo is a small-scale vinyl cutter designed for  hobbyists, scrapbookers, and  crafters. Miss Ginger has been using the Silhouette Cameo cutter for several years now, and finds it to be versatile, well-made, and, most importantly, fun! 

First, a little background on hobby "cutters".  


The first hobby cutters were "punches", not unlike the old one-hole punch we all used a kids to put our homework into binders.  Clever hobby marketers created punches in thousands of shapes, sending many a scrapbooking hausfrau into the poorhouse as she spent the butter and egg money on the latest, newest shapes.  But punches were limited in size and intricacy, so the crafting industry needed to come up with a new idea, since they had run out of simple shapes! 


Next came the "die cutters", which use a sort of high tech "cookie cutter" to punch shapes out of paper and other flat materials.  Die cutters had, and still have, the distinct advantage of being able to emboss paper without cutting it, making textured cards as easy as turning a crank. This machine allowed the craft marketers to rake in millions as they created a seemingly endless array of shapes and textures that led us all to scream "Buy ALL the dies!" At $10- $20 bucks a pop, husbands across the nation where declaring Michael's "off-limits" and canceling internet service to prevent unauthorized ordering. 
Yet still, we wanted more....


Crafting engineers figured out how to make a small-scale electronic cutter for hobby use, but their marketing people screamed "WAIT! Don't screw up our market for shapes!  We need consumables!" and the "cartridge" was born.  In an astounding feat of retro technology, this almost "cutting edge" machine was relegated to the video games of the 1980's by requiring the user to obtain the cutting files on proprietary cartridges that contained the files needed to make this hunk of plastic slice a frog out of green paper.


Then came the Silhouette Cameo, and crafters the world over were freed from the tyranny of craft marketers forever!  The Silhouette, as modern as it is beautiful, allows the user to download design files from the internet, and store them on just about any memory device they see fit.  The machine works with memory cards, USB sticks, or even your computer's hard drive.  Once you've downloaded a file, it's yours forever! 


The file type is proprietary, so the marketers haven't completely lost their minds; you can only use files you download from the "Silhouette Store", a sort of iTunes for shapes.  But there are still huge advantages over cartridges: they download immediately over the internet, you can resize and manipulate them with the Silhouette software, you can store hundreds (maybe thousands?) on one tiny SD card, and most importantly, they are really cheap! You can also create your own designs with the software, which is included with the machine! 


Another huge advantage for Miss Ginger is that this machine, in addition to cutting paper, can cut self-adhesive vinyl, making it useful for lettering and stenciling without having to use adhesive spray or tape.  It can also cut fabric, and can be used as a pen plotter with accessory ink pens. This photo, with cover raised, shows the relatively simple inner workings.  The white plastic rollers are adjustable to different widths of material.  The knife fits into the black cutting head, which you can see to the left of the machine, just above the sheet of vinyl.  When you download a design file, you will use the silhouette software to let the machine know what type of material you are using. Sending the design to the machine is just like send a print job to a printer, and the machine whirs into action, moving the blade side to side, and the material up and down, to cut the lines and curves of your design... so easy! 

What can you make with the Silhouette?  Check out Miss Ginger's craft pages- most of her designs use the machine in some way or another!  In addition to vinyl, paper, and fabric, the machine can cut heat transfer material, so you can iron-on to fabric to create custom garments, pillows, etc.  There is a rhinestone transfer material that Miss Ginger has yet to try, but it allows one to use heat-set rhinestones to create intricate designs. 

The machine is not cheap, but it's not super-expensive, either... it costs about the same as a mid-range sewing machine. The real value, however, comes in the price of the designs... most cost about 99 cents! You download only the ones you need, when you need them, and once you've bought them, you can use them again and again.  The vinyl material is kind of expensive when you buy it in the little rolls they sell at retail, but you can order a commercial-sized roll from US Cutter and use it forever! 

For versatility and usefulness:   5 lipsticks!
For value in the long term: 5 lipsticks!
For quality and durability: 5 lipsticks!

It's unanimous! The Silhouette Cameo earns Miss Ginger's coveted:

5 LIPSTICKS AWARD!

Now, what do YOU want to see Miss Ginger make with it? 

Thursday, May 30, 2013

I'm a Pinteste!

You'd have to be living under a rock not to have heard of Pinterest, the online "pin board" site from which Miss Ginger steals ideas gains inspiration!  
You may not, however, have heard of Pintester,  the unabridged "companion site" written by Sonja Foust. Well now you have!  Don't miss it-  it's 10 times more entertaining than Pinterest, because it includes 100% more SNARK! 
Here are all the things Miss Ginger loves about Pintester:
1. It's grassroots. Just a young lady trying to make a difference in the world- like Miss Ginger!
2. It involves crafts, cooking, and all things domestic-  like Miss Ginger!
3. It involves copious amounts of alcohol- just like Miss Ginger!
4. Consequently, things get fucked up-  like Miss Gingers!
5. She curses like a sailor- just like Miss Ginger!

Actually, I'm pretty sure Sonja and Miss Ginger are drag-queen twins, separated at birth by some drunk, cursing nurse at the hospital who was too distracted by her macrame to notice that one of us was stolen by some hateful trafficker who had an order for a girl with blue eyes! Glad he grabbed her and not me!! 

ANY HO, Sister Sonja had the clever idea to enlist her readers in helping her test all the pins on Pinterest! Well, maybe not ALL of them (is anyone REALLY going to spray paint beans pink just so their vase won't be empty?! sheesh!)  She created an event she's calling "The Pintester Movement", and if you are reading this, you are now a part of it, because:

So, check out my first post as a "Pinteste" and let me know what you think!!


Saturday, April 20, 2013

Fleur-de-lis Wind Chime

Fleur-de-lis patterns have been all the rage since hurricane Katrina, but in fact, fleur-de-lis have been used in Louisiana for ages as a representation of the state's French heritage.  Miss Ginger has always loved fleur-de-lis, and finds the motif to be remarkably gender-neutral, making them great for adorning gifts and decorations for everyone.  Here's a beautiful adaptation of her wind chime using this recherché symbol of rebirth.


For this project Miss Ginger used 3 bottles. One was the "magnum" size she usually buys for parties, and the other 2 were regular wine bottles, with different shapes to add interest.


She used her Silhouette Cameo machine and its Studio software to create the stencils of self-stick vinyl. If you've thought about buying a cutting machine, this is the one to get! Rather than having to buy cartridge after cartridge to collect the shapes you want, the Silhouette Store allows you to download only the ones you need, right from your computer! Miss G downloaded the flour-de-lis pattern, resized and duplicated to meet her needs, and cut the stencils in just a few minutes.


One the stencils were applied, Miss Ginger used Armor Etch cream to etch the pattern.  You could also etch them with a diamond burr or sandblaster, but the etching cream is fast, easy, and permanent. 


After finding a cork to fit each bottle, Miss G added a screw eye to each end, covering the threads with a waterproof glue to ensure it doesn't work loose in the wind.  Starting with the largest bottle at the top, she used lengths of clock chain from Lowe's to connect the layers.  For the wind catcher, she used a 4" square of thin board turned to make a diamond, and stenciled a fleur on both sides with white paint.


Sunday, February 10, 2013

Upcycled Fragrance Warmer

Anyone who lives in an older home like Chez Ginger knows that they can have a certain "nasal patina" that just comes with the territory. And anyone who has a kitty like Miss Shelby knows that they come with their own set of odors, as well. So Miss Ginger is quite experienced with the many gizmos and gadgets designed to fragrance the home. They can be quite expensive, if not initially, then long term as their liquids, oils, and nonesuch have to be replaced.

Here's an upcycle that gives your home the scent of fresh laundry, using castaway glass bottles and an inexpensive "filler" to be revealed later.


You'll need some empty "longneck" beer bottles, or other bottles of a similar diameter, and some empty wine bottles.  You'll also need a bottle cutter, and a "dremel" tool with a diamond wheel cut-off blade.
Be sure your wine bottles have a nice, deep "punt" on the bottom of them. You'll see why this is important in a minute.
Cut your beer bottles below the neck but above the label.  Miss Ginger leaves the label in place, because she uses it as a cutting guide, and removes it later, but you don't have to.  Cut the wine bottles about half an inch or so from the bottom, so you are left with pieces that look like little glass sombreros. 
Next, use the diamond-wheeled saw to carefully cut around the small label on the back. You are literally going to cut the label off, glass and all.  Start by gently guiding the wheel along one side of the label to create a scratch.  Put a drop of cutting oil (it comes with the blade) onto the scratch (the scratch keeps the oil from rolling off) and continue to cut along the line until you have ground all the way through. Once you have cut all four sides of the label it will drop through. It may take a little practice to learn the best way to cut the label away, and beer bottles are made of very cheap glass, so you may break a few before you get the hang of it. Be sure to wear gloves and goggles for this part!

If all goes well, it will look like this.  On the other side of the bottle, cut a smaller hole, or a series of slits, or some other shape to allow air to flow through.
Often, the glass will break at the top of the 2 vertical cuts, like you see here. As long as there are no other cracks in the glass, this is okay... you really won't see it once everything is set up.
Once everything is cut, use emery cloth or a diamond bit to remove any sharp edges, peel any remaining labels off, and give everything a good wash. (Bonus tip:  WD-40 is a cheap and effective product to remove just about any kind of adhesive residue, and it's cheaper than those "goo" products you buy just for that purpose. But it stinks, so use it outside!)  Flip the "sombrero" over, place it on top, and you're ready to load!

Here's the secret ingredient: Downy Unstoppables Fabric Softener. This exact brand is actually made up of little wax pellets impregnated with fragrance that are supposed to go into your washer.  Miss Ginger has not used it for that purpose, since it really doesn't seem like it would be good for your washer, the drain, or your clothes, but hey, who is she to judge?!
Fill the little sombrero with pellets, drop in a candle, light it, and wait a few minutes.  The candle will warm the pellets until they melt, releasing the fragrance of fresh washed laundry for hours!  The fragrance lasts through many lightings, even if the pool of pellet juice cools and hardens; just put in a new candle and remelt it!

DISCLAIMERS: Use common sense when burning any candle!!
DO NOT leave any burning candle unsupervised!
Place on a non-flammable surface.
Ensure a safe distance from curtains, fabrics, paper, etc.
Keep away from children and pets.
Do not move the unit until the candle is extinguished and the wax has hardened.

The maker of Downy Fabric Softener make no claims for the suitability of their product for this purpose. Use at your own risk.

But trust Miss Ginger:  it smells WONDERFUL!  Make one for every room and it's like a whole house full of "clean sheet night!"


LinkWithin

Related Posts with Thumbnails