The FABULOUS Miss Ginger Grant!

The FABULOUS Miss Ginger Grant!
Click here to dig through my stuff!

Miss Ginger's FABULOUS Things!

NEW!!! Visit my online store for your chance to buy all things Ginger!

Search Miss Ginger's FABULOUS World!

Custom Search

Translate

Showing posts with label bottle crafts. Show all posts

Sunday, September 15, 2013

Like Sands Through the Hourglass.... !

Would you believe this beautiful tchochke is made entirely of trash?! With a little scrap wood, a couple of empty bottles, and a lot of imagination you can make a beautiful hourglass as a gift to remember a special time with someone, or for yourself, to time your eggs in the morning! Miss Ginger has spent some time perfecting this technique, and this example is her latest creation.  This one is pretty large, with the glass elements coming from 2 large magnum wine bottles.  Boy G created all of the pieces for her on his new lathe, but you could also adapt this technique to use precut discs from the craft store and some rescued spindles from a thrift store chair. Miss Ginger left this one plain, but you could also personalize it with nifty paint job or some etching on the glass. Her one regret on this design is that she used white sand from the craft store, and added blue and silver glitter to make it sparkly, and it kind of looks like she is counting the minutes with powdered laundry detergent! 


It's glued in there now, so there's no going back! Here's another one she made, with step-by-step instructions:


The first step is to find 2 matching bottles  and cut the bottoms off. Depending on the shape of your bottles, you may need to cut the neck back, as well.  These Zing-Zang bottles have served Miss G well, and now, they will be with her for eternity! 


To connect the bottles, Boy G made this little wooden piece by using a hole saw to cut a disc, and then used a forstner bit in the drill to make the indentations. Miss Ginger thinks you could probably find a napkin ring that would work if this is beyond your skills. 


Here are all of her parts, ready for assembly. In addition to the 2 bottles and the connector, she has 3 spindles and 2 discs that Boy G made on the lathe. The discs have a channel cut that the bottle fits into. You can cut out the discs with a large hole saw, and cut the channel with a smaller one. There are also holes drilled for the spindles, which required Miss Ginger to recall her high school geometry! Click here to learn how to find 3 equidistant points on the circumference of a circle! 

Beginning at the bottom, glue the glass element to the base by filling the channel with E6000 Adhesive, and then placing the glass. You'll need to let this dry before you move on. E6000 is the perfect adhesive for this because it bonds well to both glass and wood, levels itself and fills the void between the glass and the wood, and dries rock hard and crystal clear. And, it's made in the great state of Louisiana! 


The connector goes on next. Once that's dry, you can add the other bottle on top. Be sure that you don't get adhesive in the hole of your connector or your hourglass will be frozen in time! 


Use wood glue to set the spindles into holes on the base piece.  Let everything get good and dry at this point

Once all of the glue has dried, it's time to fill and calibrate your hourglass.  Miss Ginger used regular garden sand in this one, which she had sifted several times to get all the pebbles out of it. You can also use colored sand from the craft store or an aquarium supply store.  (Now that she has perfected the assembly technique, Miss Ginger is going to experiment with different types of filler and different size holes to see if she gets different run times!)

Start a stopwatch and begin pouring sand into the upper chamber.  As the sand runs through, keep adding sand until you get close to your desired time.  Miss G filled this one for 3 minutes.


Once you have filled it, flip the whole thing over into a bowl and let the sand run out, to double check your timing.  This also gives you the opportunity to remove some sand if you overpoured the first time.


Once you have the correct amount of sand, pour it back in and let it run to the bottom.  Fill the channel in the upper disc with adhesive, and apply wood glue to the holes for the spindles. Working quickly, place the top onto the glass, guiding the spindles into their holes.  Once the top is in place, flip the hourglass over to let the adhesive level out and harden.  (If you don't flip it over, the glue will slowly run down the glass and ruin your work.) Let it dry completely, and your heirloom is ready for giving or using! 

BTW, if your skills with wood and glass are limited, you can get a similar effect using plastic bottles and foam board. 


Thursday, May 30, 2013

Ragu Goes Alladin- The Pintester Movement Post!


When Miss Ginger learned of "The Pintester Movement" she new immediately that she must participate, and she knew immediately which pin she would try to duplicate!  She had seen the Moroccan inspired Ragu jars on hundreds of boards, and felt pretty confident of her ability to pull this off.  While it may not really be in the spirit of the Pintester Movement to take on a craft she's already good at, let's face it: what ISN'T she already good at! I mean, the cards ARE kinda stacked in her favor. Still, it gave her the opportunity to knock off a craft  be inspired by another artist AND participate in an event of epic proportion, one sure to take the internet by storm! 

So, she printed off the "inspiration photo", left, and assessed her ownership of the required materials.


In the photo, the color on the glass seemed much more transparent than the paints Miss Ginger owned, so she made a trip to Michael's to get some glass stain and the gold paint to make the "metal" parts.  She didn't have any spaghetti sauce jars (Miss Ginger would NEVER serve jarred sauce!) so she grabbed a couple of pickle jars from her stash. (Miss Ginger LOVES pickles!) 

When she went back to the original pin to research the kind of paint originally used, she discovered that the pinner had committed the CARDINAL SIN of pinning- rather than linking her pin to the actual post about Moroccan inspired jars, she linked her pin to the title page of her enitre fucking blog!  Bitch!  Ain't nobody got time fo' dat!  There was NO WAY Miss Ginger was going to sift through 10,000 posts about this chicks wedding just to find out what kind of fucking paint she used!  "We'll just go with what we have", thought Miss Ginger, "I'll exhibit the true Pintester Spirit®!" 

Initially, Miss Ginger decided not to use a paper pattern to create her design- she didn't want it to look "perfect" or "machine made";  it should have an "old world" look, with patina and shit.  Yeah, no worries. The first attempt went into the trash. Miss Ginger knows when to admit defeat! 


So, for her second attempt Miss Ginger created a paper pattern inspired by the yellow jar in the photo.  She placed it inside the jar and brushed the gold paint on from outside, but when she pulled the pattern out: UGH! This paint was NOT covering the jar- it was just sliding around on the surface, creating little golden slime trails as it went.  Clearly not the right paint, but also clearly not going to be replaced at 10pm after most of a bottle of pinot grigio! It wasn't looking as metallic anyway, so Miss Ginger had the BRILLIANT idea to throw some glitter on it to help the paint cover.
That kinda worked, so Miss G went with it. She didn't have much choice at this point!  

After she got it all glittered she passed out went to bed, and got up the next morning to put the color on. 


This turned put to be a big hot mess, as well.  The "glass stain" that Miss G got at the craft store was runnier than, well, um.... I can think of an acceptable simile for something really runny!  But trust me when I tell you, this shit was runny! (oops, it happened anyway!) As you can see in the photo, this paint, too, kind of smeared on the surface of the glass. It was completely impossible to get even coverage. Miss Ginger let it dry, hoping a second coat (and more pinot grigio) would improve the final product.


Having gained a little confidence by fucking up when she tried to "follow the directions", Miss Ginger grabbed another jar and started to dab on gold gilt like a pro!  Once she got the "dabbing" technique down pat, she was pretty pleased with the appearance of little gold dots, and dabbed the night away, without a pattern, she might add! Well, the pickle jar DID have that little barrel-vaulted thingy at the top that ALL pickle jars seemed to have, so she sort of followed that, which seemed to work. So confident she became, in fact, that she decided to set in some paste "jewels" that she had in her crafty stash.  By now, our girl was positively giddy with the anticipation of OWNING this craft! 


After the gold paint dried, Miss Ginger used her regular glass paint to color the spaces between, with much greater success.  She is pretty happy with the way this one turned out, but she realized she had taken a LOT of poetic license up to this point, and hadn't really produced anything that looked like the original photo, so she grabbed another jar and tried, in earnest, to replicate one of the jars in the original pin.  


So, here's the side-by-side, folks:


Whadya think?  Pass or fail?

Saturday, April 20, 2013

Fleur-de-lis Wind Chime

Fleur-de-lis patterns have been all the rage since hurricane Katrina, but in fact, fleur-de-lis have been used in Louisiana for ages as a representation of the state's French heritage.  Miss Ginger has always loved fleur-de-lis, and finds the motif to be remarkably gender-neutral, making them great for adorning gifts and decorations for everyone.  Here's a beautiful adaptation of her wind chime using this recherché symbol of rebirth.


For this project Miss Ginger used 3 bottles. One was the "magnum" size she usually buys for parties, and the other 2 were regular wine bottles, with different shapes to add interest.


She used her Silhouette Cameo machine and its Studio software to create the stencils of self-stick vinyl. If you've thought about buying a cutting machine, this is the one to get! Rather than having to buy cartridge after cartridge to collect the shapes you want, the Silhouette Store allows you to download only the ones you need, right from your computer! Miss G downloaded the flour-de-lis pattern, resized and duplicated to meet her needs, and cut the stencils in just a few minutes.


One the stencils were applied, Miss Ginger used Armor Etch cream to etch the pattern.  You could also etch them with a diamond burr or sandblaster, but the etching cream is fast, easy, and permanent. 


After finding a cork to fit each bottle, Miss G added a screw eye to each end, covering the threads with a waterproof glue to ensure it doesn't work loose in the wind.  Starting with the largest bottle at the top, she used lengths of clock chain from Lowe's to connect the layers.  For the wind catcher, she used a 4" square of thin board turned to make a diamond, and stenciled a fleur on both sides with white paint.


Wednesday, March 13, 2013

Upcycled Bottle Chandelier

Okay, maybe "chandelier" is a bit grand, considering that nothing really dangles, but "Upcycled Sculptural Light Fixture" seemed like an awkward title...

Anyho, Miss Ginger is pretty proud of this one! She's had the idea rattling around in her mind for a while, and finally had the holy trinity of idea, materials, and time come together.

It's easy to find a million ways to upcyle the bottoms of glass bottles, as they can be turned into all sorts of glasses, candleholders, or other vessels. The tops, however, are more problematic.  Miss Ginger saved them at first simply because she was determined to keep them out of the waste stream, but she initially had no idea what to do with them.  The world only needs so many wind chimes. After making  plethora of glasses and candleholders, the suckers were beginning to pile up!

The trick to this upcycle is getting the correct adhesive. Glass is slick and non-porous, so sticking it together can be tricky. Not only does the adhesive have to hold the glass pieces together, invisibly, it also has to hold them solidly enough to support the weight of the structure. Glass is heavy! Superglue, hot glue, white glue, construction adhesive- all fail on some part of the test or another.

Epoxy is the only adhesive that will successfully adhere glass and support it's weight. Most epoxies are a pain in the ass to use, as they require mixing in just the right proportions.  Loctite Instant Mix 5-minute Epoxy is the perfect combination of strength and open time for this project, and is readily available at Lowes or Home Depot. Plus, it comes with a self-mixing syringe thingy that dispenses the adhesive and the hardener in just the right proportions! And, it dries to a transparent "yellowish clear" that totally disappears on green bottles!
Because glass is so slick, even epoxy can't reliably stick to the smooth surface.  To solve that problem, Miss G used a rotary tool with a diamond burr to scuff up the glass everywhere there was a joint. 
The first "layer" was pretty straightforward, with a healthy dab of epoxy at each side joint, and again where the necks touched.  The epoxy dries to full strength overnight, but it only takes about 20 minutes for it to harden solidly enough to continue with the next layer.
Adding the subsequent layers was only a little bit tricky due to the angles of the bottles. Miss Ginger used a Sharpie to mark the points where the bottles touched, dry fitting, marking, scuffing, and gluing each bottle one at a time.  It sounds tedious but it really went quickly. 

As the angle became steeper on the 3rd and 4th layers, Miss G used clamps to hold the bottles in place until the epoxy had set enough to hold on its own.  After 4 layers were glued up in this manner, Miss Ginger let the epoxy set overnight before she tried to move  or turn the structure.
The next day, Miss Ginger flipped the entire thing over and added one last layer to the other side of the initial layer.  This will form the top of the fixture, so she added a chain circle around the neck of every 4th bottle, to distribute the weight when the fixture hangs. She wanted to use the fixture outdoors, so she bought a weatherproof floodlamp holder  and used binder rings to center it on the chain, just above the bottles, so the light would catch the neck of the bottles as it shines down. 
Around this, she added a glass tile  to conceal the "inner workings".
Miss Ginger is a strong girl, but she needed help to hoist this sucker into position- it weighs a ton, and it's awkward to hold.  If you use it indoors, you will need to make sure to hang it from a large eye-bolt screwed directly into a ceiling joist.  Outdoors, just loop a chain around a strong tree-branch, or hang it from an eave or soffit.

Miss Ginger loves it so much she's going to make another so she'll have a pair!

Tuesday, February 19, 2013

Wine Bottle Apothecary Jars

Here's another great wine bottle craft, and it's also a great way to use up some wood scraps. They could also be decorated, etched or otherwise embellished to make a truly personal gift! 

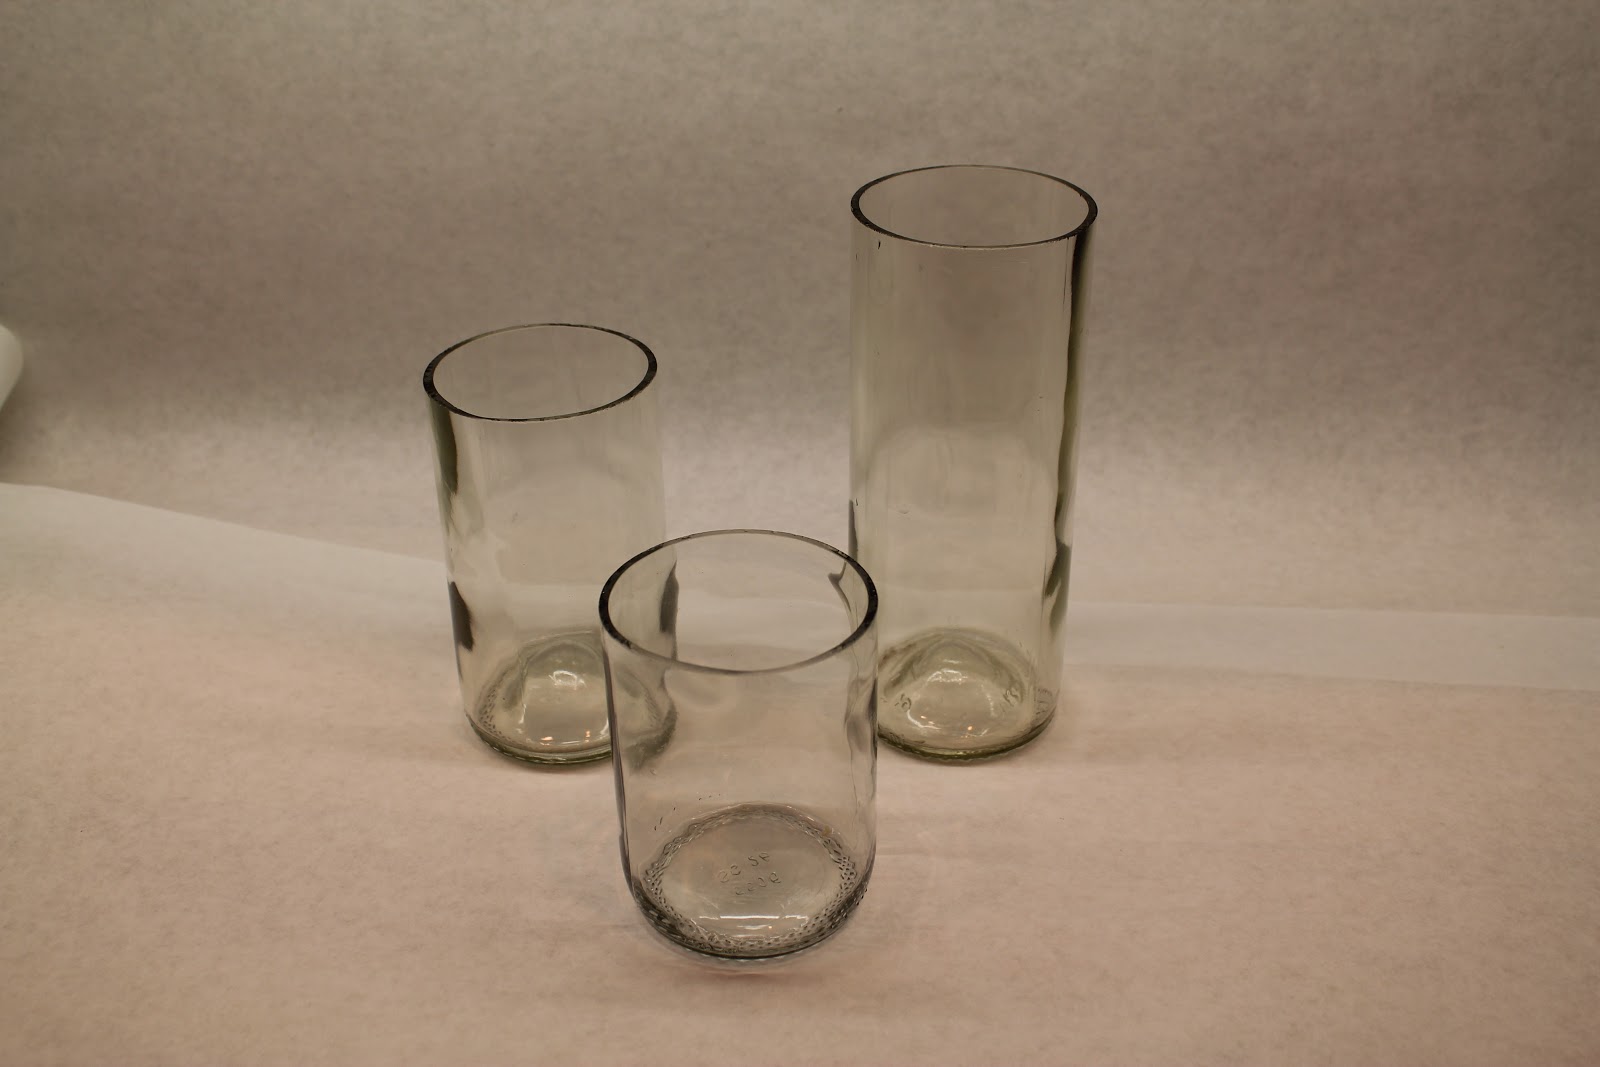
Start by selecting your bottles and cutting them down to your desired size.  Use a piece of emery paper to soften the sharp edges.

To make the lid, use a scrap of solid wood (this is poplar) and a hole saw fitted to an electric drill.  If you have access to a drill press, it's a bit easier to control, but any drill will work.  You'll need 2 hole saws, one a bit bigger than the outside diameter of your bottle, and one the exact size of your bottle.  Miss Ginger used a 3- 5/8" and a 2-3/4".  Start with the larger saw, and cut into the wood just far enough to mark your circle. Don't cut all the way through the wood yet, but it's okay if the pilot bit goes all the way through.


Next, switch to the smaller saw, and center the blade by guiding the pilot bit in the center of the blade into the center hole. Cut a slot about halfway through the wood; this will sit over the rim of your bottle.  If you can't find a saw the exact diameter, or if the glass is thick, you may need to use 2 consecutive sizes of saw to make this channel wide enough to fit the bottle.

Once the channel is cut, return to the largest blade, center the pilot bit, and cut the lid all the way through.  If you are making multiple lids,  perform all the cuts with each blade in sequence, to avoid changing the blade every time!

Sand the lids down, spray with a clear polyurethane, and add a decorative knob to the top. Now your jars are ready to fill with special treasure for yourself or as a thoughtful gift! 

Sunday, February 10, 2013

Upcycled Fragrance Warmer

Anyone who lives in an older home like Chez Ginger knows that they can have a certain "nasal patina" that just comes with the territory. And anyone who has a kitty like Miss Shelby knows that they come with their own set of odors, as well. So Miss Ginger is quite experienced with the many gizmos and gadgets designed to fragrance the home. They can be quite expensive, if not initially, then long term as their liquids, oils, and nonesuch have to be replaced.

Here's an upcycle that gives your home the scent of fresh laundry, using castaway glass bottles and an inexpensive "filler" to be revealed later.


You'll need some empty "longneck" beer bottles, or other bottles of a similar diameter, and some empty wine bottles.  You'll also need a bottle cutter, and a "dremel" tool with a diamond wheel cut-off blade.
Be sure your wine bottles have a nice, deep "punt" on the bottom of them. You'll see why this is important in a minute.
Cut your beer bottles below the neck but above the label.  Miss Ginger leaves the label in place, because she uses it as a cutting guide, and removes it later, but you don't have to.  Cut the wine bottles about half an inch or so from the bottom, so you are left with pieces that look like little glass sombreros. 
Next, use the diamond-wheeled saw to carefully cut around the small label on the back. You are literally going to cut the label off, glass and all.  Start by gently guiding the wheel along one side of the label to create a scratch.  Put a drop of cutting oil (it comes with the blade) onto the scratch (the scratch keeps the oil from rolling off) and continue to cut along the line until you have ground all the way through. Once you have cut all four sides of the label it will drop through. It may take a little practice to learn the best way to cut the label away, and beer bottles are made of very cheap glass, so you may break a few before you get the hang of it. Be sure to wear gloves and goggles for this part!

If all goes well, it will look like this.  On the other side of the bottle, cut a smaller hole, or a series of slits, or some other shape to allow air to flow through.
Often, the glass will break at the top of the 2 vertical cuts, like you see here. As long as there are no other cracks in the glass, this is okay... you really won't see it once everything is set up.
Once everything is cut, use emery cloth or a diamond bit to remove any sharp edges, peel any remaining labels off, and give everything a good wash. (Bonus tip:  WD-40 is a cheap and effective product to remove just about any kind of adhesive residue, and it's cheaper than those "goo" products you buy just for that purpose. But it stinks, so use it outside!)  Flip the "sombrero" over, place it on top, and you're ready to load!

Here's the secret ingredient: Downy Unstoppables Fabric Softener. This exact brand is actually made up of little wax pellets impregnated with fragrance that are supposed to go into your washer.  Miss Ginger has not used it for that purpose, since it really doesn't seem like it would be good for your washer, the drain, or your clothes, but hey, who is she to judge?!
Fill the little sombrero with pellets, drop in a candle, light it, and wait a few minutes.  The candle will warm the pellets until they melt, releasing the fragrance of fresh washed laundry for hours!  The fragrance lasts through many lightings, even if the pool of pellet juice cools and hardens; just put in a new candle and remelt it!

DISCLAIMERS: Use common sense when burning any candle!!
DO NOT leave any burning candle unsupervised!
Place on a non-flammable surface.
Ensure a safe distance from curtains, fabrics, paper, etc.
Keep away from children and pets.
Do not move the unit until the candle is extinguished and the wax has hardened.

The maker of Downy Fabric Softener make no claims for the suitability of their product for this purpose. Use at your own risk.

But trust Miss Ginger:  it smells WONDERFUL!  Make one for every room and it's like a whole house full of "clean sheet night!"


LinkWithin

Related Posts with Thumbnails