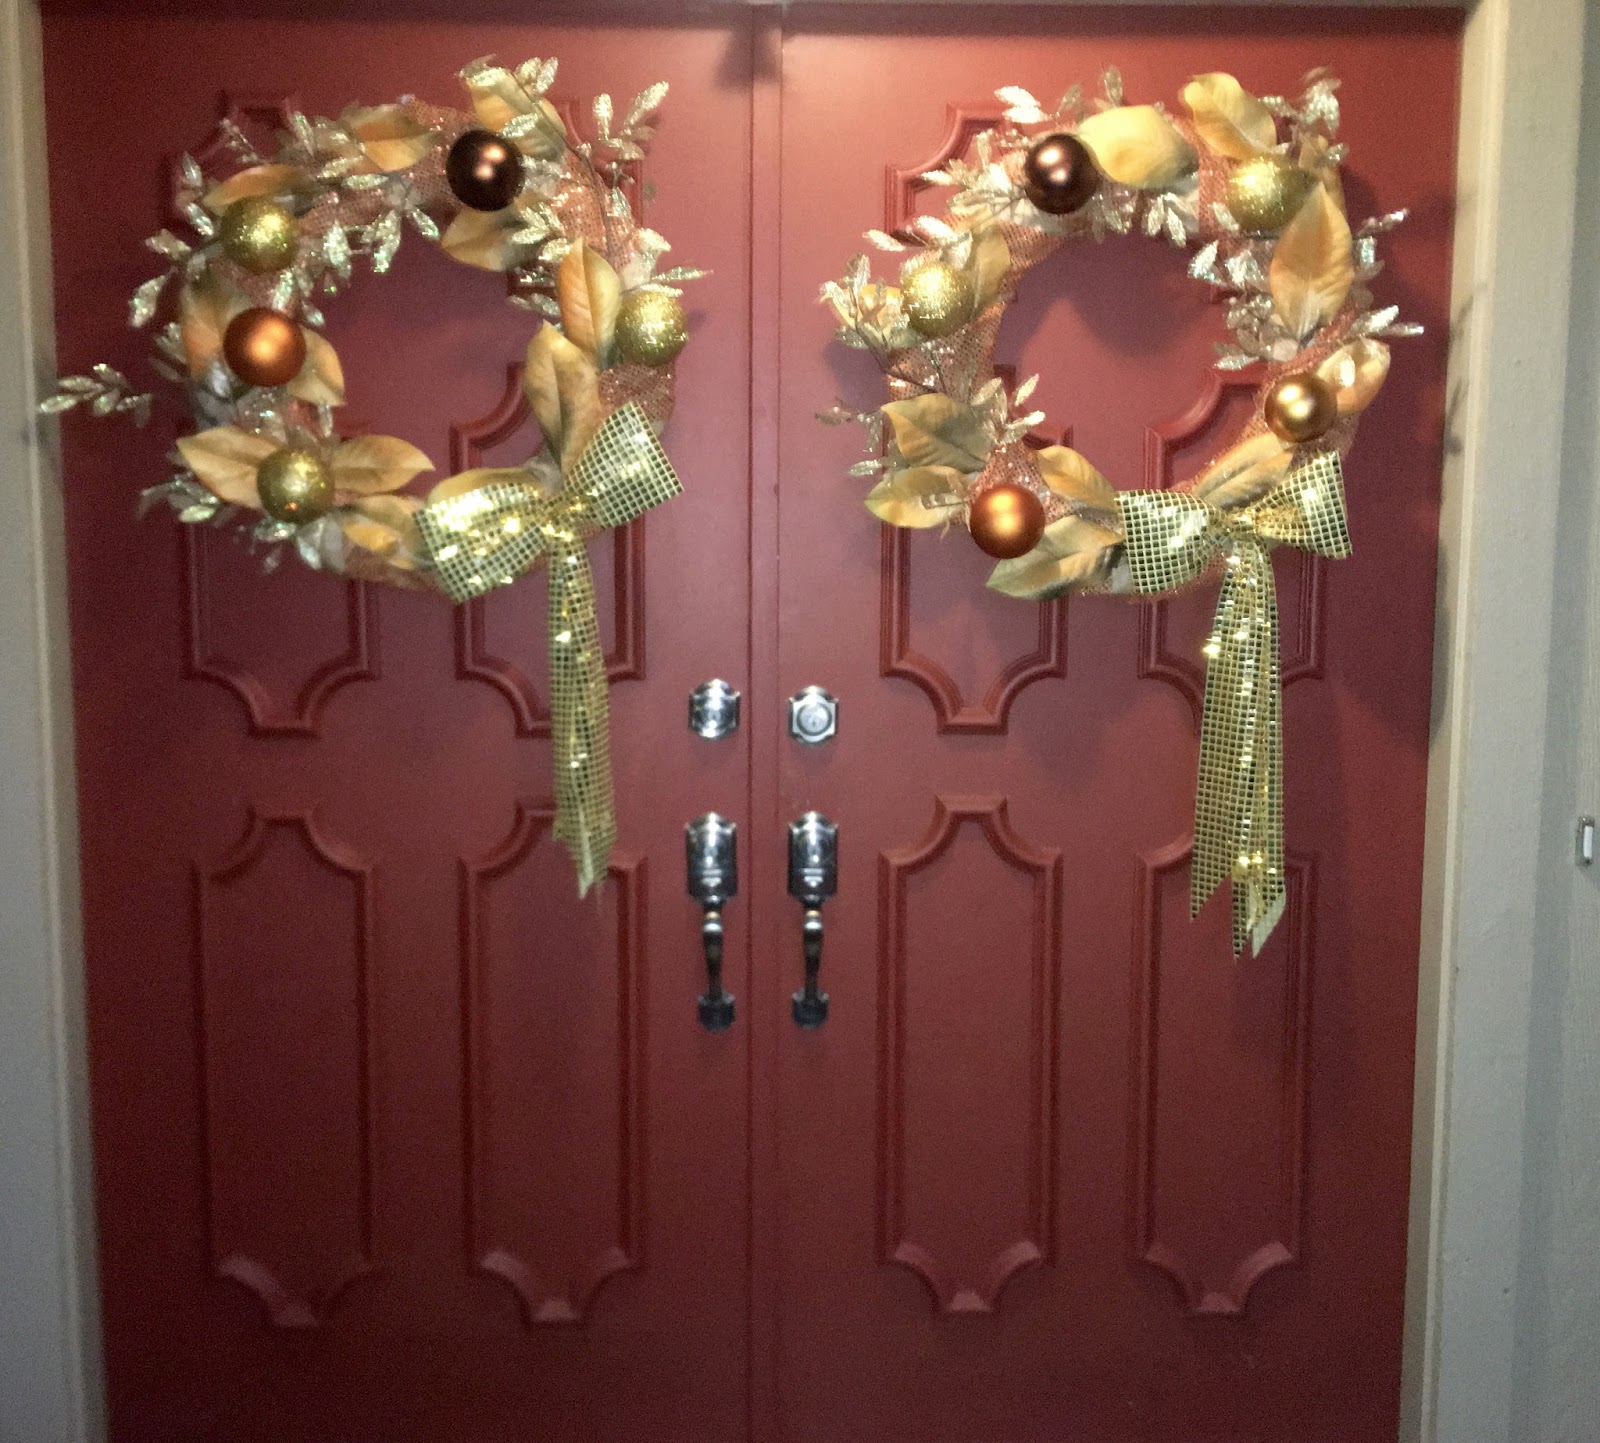
Miss Ginger made these fall holiday wreaths for the entrance to La Riata, and she's so proud of them she wanted to share them with you! They were easy to make, and best of all, they were FREE! Not one single trip to the craft store! It's all made from crap she had around the house! You can do it, too, with a little resourcefulness and creativity!
She started by making her wreath bases from some styrofoam sheets that came as packing material from a piece of furniture. Styro wreaths at the craft store are SO expensive, but with a an inexpensive styrofoam cutter you can make them yourself from garbage! Miss G taped 2 pieces together to make a wreath large enough for her door.
For the next step Miss Ginger used brown craft paper, which she had in the garage in a perfect 9" width designed to fit a paint masking device that she can no longer find, but you could cut regular craft paper into strips... This would be a great use for all of that brown paper Amazon.com uses to pack all that stuff you buy from them, since you're going to crumple it up anyway!
Begin by creating a double ring of crumpled paper on top of the styrofoam, using tape as needed to keep it in place. Then, begin wrapping the styrofoam and paper together with more crumpled paper to create the base of the wreath.
When you're done it will look sort of like a paper coffee cake, as observed here by Miss Ginger's assistant, LittleRed Corvette, himself an expert in fall colorations!
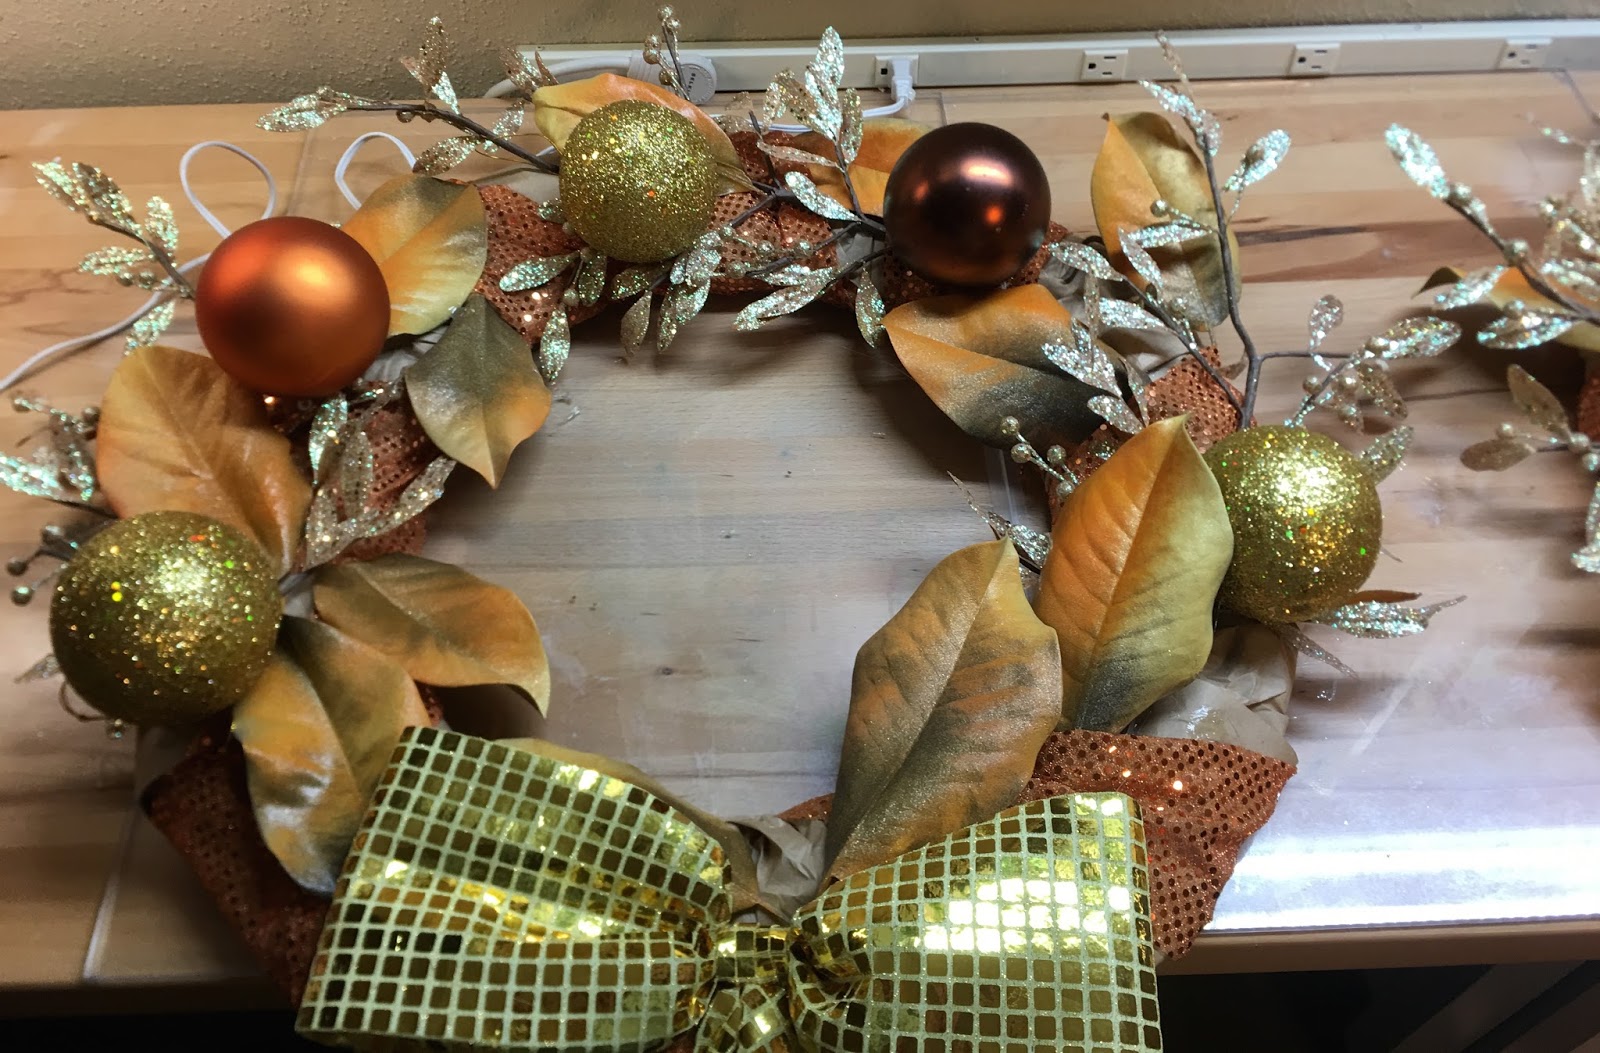
Miss Ginger didn't have any fall-hued ribbon to use as garland, but she did have miles of orange glitter-dot fabric left over from some ancient costume, so she sliced it into strips with a rotary cutter and put it to use!
To make the bow she used more glitter dot in a different color, and wrapped it around a 5x10 piece of interfacing to give it body... you could use a sheet of paper if you don't have interfacing laying around. She wrapped 4 pieces in total: one for each loop of the 2 bows.
To shape the loops, she folded them wrong sides together, then gathered and stapled each loop.
Next, the 2 loops are stapled together...
... a loop is created and wrapped around the connection to simulate a "knot"...
... and 2 more lengths of ribbon are added to create the tails.
Now the fun part: decorating your wreaths! Here's a little tip: if you are making a pair of wreaths that will be shown together (like these double doors) then work on them together to make sure they balance. You won't make them match completely, but you want to make sure they have the same density of elements so the will go together. Miss Ginger likes to lay out all of her gee-gaw for both wreaths before she attaches anything,so she can make sure she's happy with the balance.
Miss Ginger used 3 elements on this wreath: dried magnolia leaves from the yard that she sprayed with fall-colored spray paints, some glitter branch thingies left from an old christmas tree theme, and some gold plastic balls left over probably from the same tree. Use whatever you have, and if it's not the right color, spray it! Pine cones, dried branches, old scratched ornaments... almost anything can be dolled up with some spray paint and some glitter!
Once the layout was finalized, it took no time to hot-glue everything in place! Miss G added greening pins to connect the heavier items directly to the styrofoam, but you could cut some paper clips into "u's" if you don't have greening pins. Glue another pin or clip onto the back of each wreath for a hanger and you're ready to deck your halls with a gorgeous wreath made of trash!
SaveSave