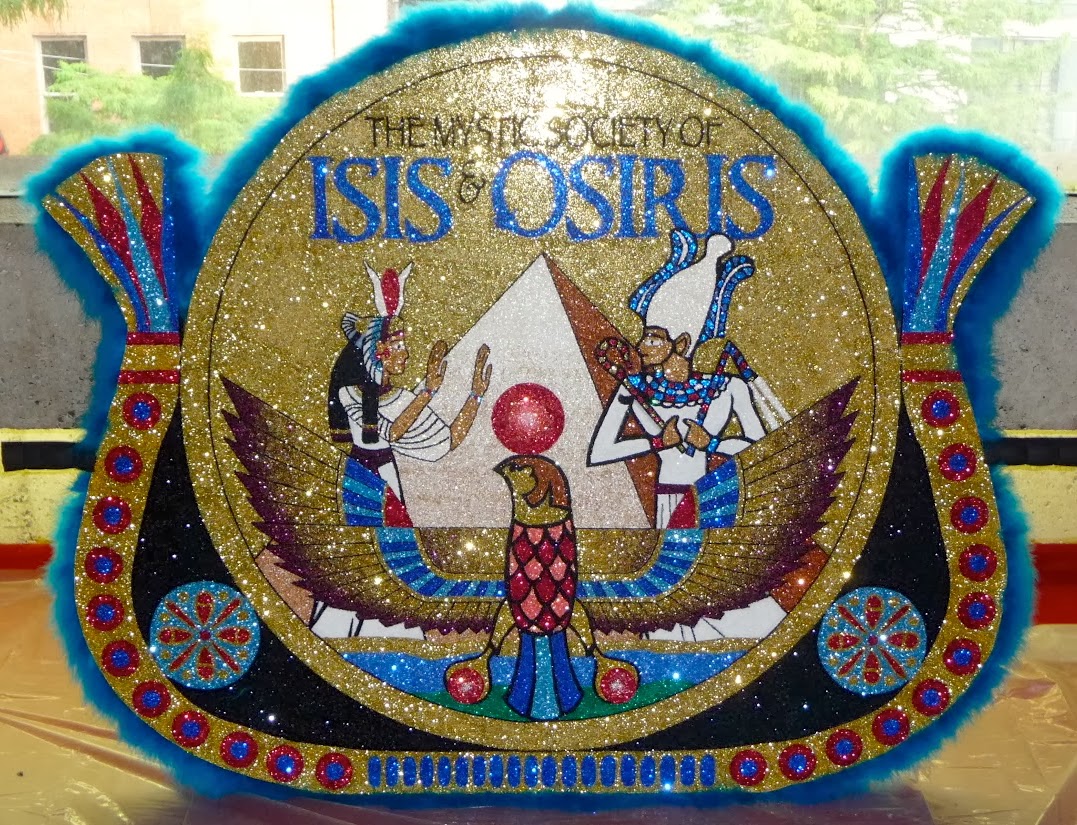
Search Miss Ginger's FABULOUS World!

Custom Search

Translate

Sunday, May 19, 2013

Stained Glass Bottles and Jars

Here's an easy, fun way to keep glass bottles and jars out of the waste cycle that requires no specialized equipment or skills- just an artistic eye and a few bottles of inexpensive paint!  It's so safe and easy even a kid can do it, but adult artists will also enjoy the ability to recreate "old world" techniques with modern, water-based products! 

Gallery Glass paints are one of those "sleeper" products that sort of "undersells" itself on the shelf at the craft store, with a lot of the example creations looking sort of juvenile and "crafty".  Miss Ginger's taste is a bit more "traditional", so she prefers to use the products to reproduce the look of stained glass, but it just underscores the fact that this craft has something for everyone!


What most of us think of as "stained glass" is actually "leaded" glass; thousands of pieces of colored glass, cut into sort of a mosaic, and pieced together with flux and solder. Beautiful, long-lasting, and expensive, real leaded glass is hard to come by these days. The work is tedious, somewhat dangerous (hot soldering irons, sharp glass, and molten metal!) and requires a lot of patience, practice, and trial and error! 


These products give the look of leaded glass with no lead, no heat, and no sharp edges!  The secret to the most traditional-looking results are the Redi-lead® strips  that provide the look of soldered lead from a self-adhesive vinyl product! The flexible "lead" lines peel off the backing paper with their adhesive intact, ready to smooth onto any glass surface. Easily cut to length with an Xacto® knife, the strips provide a consistent width and depth, similar to the lead wire that would have been used in days of old- but without that pesky problem of lead poisoning- not to mention the hassle of soldering!  With a paper pattern under the glass, it's easy to follow along the lines and curves from the outside to create the "seams" between your "pieces of glass"!

Liquid Leading® provides the look of soldered joints, without the hassle of a soldering iron and the danger of lead solder.  With the consistency of thick black paint, it's easy to dab Liquid Leading® onto butt joints to create the sections that you will paint to mimic colored glass. 


Once the leading is in place and the "solder" has dried, it's time to apply the color to the pattern pieces to finish your project. You don't even need a paintbrush! The bottle has a sharp tip that allows you to flow the product right up against the lead lines, and then quickly flow enough paint across the surface to create a solid section.


The color goes on opaque but dries to a translucent finish, with a wavy texture that mimics old-fashioned stained glass. Keep the surface horizontal until the paint has set, to keep it from flowing to the bottom of your shape.  On a round jar or bottle like this, you will have to apply the color in 4 "strips", rotating the bottle after each strip to bring the next area to the top.  Although the color dries to the touch in a few hours, it doesn't "set" for several days, so as you move from one section to the next, you will need to devise a way to "hang" your project so you can work on a section while the previous sections cure.  If you set it down on an uncured section, it will stick, and you will have a mess on your hands! 


A rod or dowel wedged into a drawer provides a stable way to apply color to the top of your project without ruining the bottom.  You will have to let one side dry for a few hours before you can turn it upside down, but that's better than waiting three days for it to cure completely! 

Once all your colors are applied, you're done!  Here's the pickle jar you saw earlier. With it's lid sprayed green, it makes a beautiful storage jar with a "Craftsman" feel to it. Or, leave the lid off and it can be a period-sensitive candle holder! 

Miss Ginger's first project was these Modrian-inspired spaghetti sauce jars. Instead of using leading, she used masking tape to tape off the sections, then sprayed matte black spraypaint over the whole thing.  When she peeled off the tape, she was left with clear windows. In authentic Modrian style, she left many of the sections clear, and colored only few.  Maybe not museum-worthy, but quick, cheap, and easy- just like Miss Ginger! 

The next project was these wine bottles decorated with an oval-cut jewel pattern.  Here, she used black vinyl in her Silhouette® machine to create the pattern, hence the more modern appearance.  The only problem she found with this technique is that there isn't much depth to the sections, so the paint went on kind of thin.  She's going to fill them with blue Listerine® and put one in each bathroom, so it won't matter if the pattern is kind of weak! 
As she prepared to complete the "fully-leaded" project you see at the top of this post, she realized that the colors dry to a very different hue than the way they appear in the bottle, so she made herself a "swatch bottle" to show how each color looks when dry.


The paints cost less than $2.50 a bottle at Michael's; less when you buy a set.  The bottles you paint are free, so what's stopping you?!  Leave a comment and let Miss Ginger know how your project turned out! 


Tuesday, May 7, 2013

Consumer Product Review- Janome 300E Embroidery Machine, pt. II.

After a year of using the Janome 300E Embroidery machine, Miss Ginger is ready to give you her Consumer Product Review® on this miracle machine! She will share what she knows, what she doesn't know, and what she is still trying to figure out- so pour yourself a glass of wine, honey, 'cause she has a lot coming at you!

First, let her say that the Janome machine is not unique- there are many embroidery machines on the market, and at least 2 are simply repackaged versions of the Janome.  While Elna and Bernina both make exquisite sewing machines in Switzerland, they leave the manufacture of their embroidery-only machines to the electronic geniuses in Japan. The Elna 8300 and the Bernette 340 Deco are essentially the same machine as the Janome, and are built in the same factory; the differences are cosmetic and electronic, but the mechanics are all pretty much the same. They all connect the hoop to a post at the back of the machine, which can be seen in the Bernette image below.
Janome
Bernette/Bernina
Elna

The other set of brandmates you will find are manufactured by Brother, and include their nameplate, plus Necchi and BabyLock. They can be recognized by the bar that runs from the front to the back of the machine.
BabyLock
Necchi

The top-of-the-line embroidery/sewing combo machines are typically made in any given brand's factories, but these embroidery-only machines are all manufactured in Japan.  Other than cosmetic differences, the various brands will be programmed to use their brand-specific file type, and may have a proprietary hooping configuration, as well.

So, back to the Janome!  One of the first variables one wants to consider when choosing an embroidery machine is the embroidery size.  The Janome 300E offers a 5.5" by 7.9" embroidery field. While this is not the largest embroidery field available, it is pretty large for a machine at this price.  Please note the "hoop size" and "embroidery size" is not the same.  You can buy a "mega-hoop" for this machine, and many others, but the embroidery capacity of the machine does not change.  "Mega" hoops allow you to combine designs, or pieces of designs, without re-hooping, so a larger design can be created with perfect alignment. 

The Janome comes with 100 designs built in to the machine, a menagerie of floral baskets, teddy bears, and other inane designs.  Built-in designs should really be your last consideration when choosing a machine, because you can download millions of designs from the internet, at a cost of anywhere from free to about 20 bucks. Most designs Miss Ginger has downloaded have cost about $6-7. 

The machine is designed to take PC cards, and Janome offers a number of pre-programmed cards for purchase. 

Since PC cards have pretty much gone the way of the floppy disc, they also offer a PC card adapter, that allows you to use a Compact Flash card to carry  designs downloaded from the internet from your PC to your machine.  Compact Flash memory is cheap, so you can maintain your files on CF memory and load them into the machine when you need them.  The machine also has a built-in memory, so your most often used designed can be stored directly on the machine to be called up whenever you need them.  BTW, PC card adapters are commonplace; you don't need one specific to this machine. PC card adapters are available anywhere office supplies are sold.

This machine has 3 on-board fonts that can be used to create 2 and 3 letter monograms without a computer, but with your PC card and the appropriate software, you can create monograms from any TrueType font installed on your PC.

Embroidery thread for these machines is made by several different companies, and each one has it's own numbering scheme to define the colors.  The Janome machine allows you to select among the most common thread brands, and will prompt you with the brand-specific thread number when it's time to change the thread.


There are a number of convenient features built into the Janome that allow it to do some image manipulation without a computer.  It can flip designs horizontally and vertically, as well as rotate them 360 degrees, in 45 degree increments.  Designs can be resized from 90 percent to 120 percent right on the screen, and you can move designs on the screen to change their relative position within the hoop. 

The hoops come with drop-in templates to help you place your design on the fabric, and once the machine is set up, you can have it trace the design area within the hoop to ensure your design fits within the bounds of your project.

One worthwhile accessory that is only available for the Janome, as best as Miss G can tell, the the Janome Clothsetter.  This simple, yet unique device, allows you to ensure your embroidery design with appear exactly where you want it on the fabric.  


The Janome hoop connects to the Clothsetter the same way it connects to the machine. 


With the bottom of the hoop attached to the Clothsetter, the stabilizer and fabric are set on top, the top of the hoop is laid in place, and the arm of the Clothsetter is lowered.  Align the crosshairs on the Clothsetter with the centerpoint on your fabric, press the top of the hoop into place, and you are guaranteed perfect alignment.  This accessory alone would lead me to choose a Janome machine above all others!


The stitch quality of the Janome machine is exquisite... it creates a beautiful satin stitch, a consistent running stitch, and perfect pattern replication, time after time. 
The control panel shows the time left to stitch out, the color progression, hoop size, and machine condition.  In the rare case of a thread break, or the more common occurrence of bobbin depletion, the machine allows you to back up the design in 10 stitch increments, to restitch an pattern areas that were not completely stitched.


Miss Ginger has completed quite a few projects using the machine, the most recent of which was to create "coordinated" sheets to accompany a duvet she bought on clearance, with no matching sheets available!  


The Janome 300E gets Miss Ginger's coveted 5 lipsticks!!

For the money, this machine is a knockout!!


Consumer Product Review: Janome 300E Embroidery Machine Pt. I

It's almost here: Miss Ginger's Consumer Product Review on the Janome 300E embroidery machine she bought last summer.  She's worked with it for about a year now, so she's ready to share what she knows about this machine, and embroidery machines in general.

If you're thinking "I don't sew" but the idea of embroidering garments and linens intrigues you, you're in luck.  You really don't have to know how to "sew" in the sense of cutting patterns, constructing garments, inserting zippers, etc, to embroider beautiful things for yourself or as gifts.  Think of it more like a "printer" that uses thread instead of ink, because that's really a better description!

So many people tell Miss Ginger: "I have a sewing machine... I should really use it more" or "I want to buy a machine and learn to sew", and Miss Ginger tells them "what are you waiting for?!" And Miss Ginger shudders when someone tells her "I have a machine... I think it embroiders...."   Quelle dommage! You already have one of these miracle machines in your house and you're not using it?! Tsk, tsk.

Let's start by talking about machine embroidery in general, and then I will give you details of my experience with my specific Janome machine in a subsequent post.  Embroidery machines use a computer program, generally called a design file, to move the needle and manipulate the fabric to create a pattern of stitches.  Commercial machines use multiple threads and are complicated, noisy, and expensive.  Embroidery machines designed for home use typically sew one color at a time, and the user changes the thread color when prompted by the machine.  You can buy machines that sew and embroider, which might be a great choice if you don't already have a sewing machine, or you can buy a machine like my Janome, that only embroiders; to sew seams and construct garments you need a separate machine.  Because embroidery machines do much of their work untouched by human hands, you can actually construct a garment on your sewing machine while your embroidery machine embellishes other pieces, so having both can be a time saver if you sew a lot.  A few machines are actually convertible, meaning that you can purchase an embroidery module to add to your machine.

The basic functionality is the same across all embroidery and sewing machines. They both have a needle, thread, and bobbin to create the stitches.  An embroidery machine eliminates the feed dog that pull the fabric through a regular machine, and replaces it with an embroidery module that holds the fabric in a hoop and can move it in a vertical and horizontal axis.  The design file controls the motion of the needle and fabric, placing each stitch in perfect alignment to create the pattern.

The design files are what make these machines come to life.  Most machines have some number of designs built-in to the machine, which can be selected right from the controls.  The true versatility, however, comes from the ability to use files from other sources. These machines are computers, and like computers, their technology moves fast. Originally, embroidery machines used floppy discs, CD ROM's, or PC cards that were purchased for specific machines, and preloaded with specific collections of designs. You owned a library of discs that contained your files.  Nowadays, we can download files from the internet to our home PC, and use a USB drive or memory card to transfer the design to the machine.  The most modern machines can now read files directly from your laptop, eliminating the file transfer step. Miss Ginger assumes that the next wave of technology will be Wifi enabled machines that bypass the computer and download files directly from the internet! 

Each brand of machine uses a proprietary file type, which means the same design files are not compatible across multiple brands of machines; if you bought a PC Card or CD ROM of files for a Janome machine, they would not work on, say, a Brother machine.  At one point there may have been competition among brands as to who had the most extensive assortment of designs, or the highest quality designs, but now we download designs directly from the internet, and can choose the file type required for our machine. There is also software available to convert files from one format to another. 


Speaking of software, let's talk about that for a minute, because that subject can be pretty overwhelming. Each brand of machine offers a variety of software packages, and the price tag for all of them can add up really fast! While the software packages sold by Janome, Bernina, Brother, and other machine makers may offer features that work across all formats, they a really designed to be machine specific. There are also software packages available that are not tied to a specific manufacturer, and these often offer more versatility and better value. Both proprietary and non-proprietary software packages are usually sold in "modules" or "plug-ins", so you can buy only the features you will use, and those features will interact seamlessly.

So, what software do you need? Depending on the features of your machine, and your desire for customization, you may not need any software at all. If all you plan to do is download designs off of the internet and use them "as is", you don't need any software.  Most people, however, will want at least some of the features these packages offer.

A basic "File Manager" program will let you organize and open files, rename them, group them, etc.  The file manager program will generally allow you to print templates of the final design that will aid you in placing your work correctly on the fabric. It also allows you to print thread lists (handy when you're heading out to buy thread). File manager programs may allow some design modifications, such as flipping or rotating the entire image, but to actually "open up the hood" and change anything within the design, you will need "Editing" software.  The file manager will call up the editing plug-in, if you've installed it, any time you want to take out a part of the design, resize it, combine or split designs, etc. Some programs combine the file manager and editing modules as on package so you don't have to buy them separately. "Monogramming" software makes simple work of creating custom monograms in any size within the constraints of your machine, using TrueType fonts loaded on your computer, as well as fonts included in the package.  Some machines do basic monograms in limited sizes through on-board controls, but monogramming software gives you total versatility.  

If you REALLY want to get into embroidery, you may want "digitizing" software to convert drawings, clip art, etc. into embroidery files.  The advertisements make it seems easy; the instruction books reveal that it's not.  Digitizing software has a lot of features and "moving parts", so even a computer whiz will need to set aside the time to work through some tutorials if they seriously want to learn to digitize.  "Ain't got time fo' dat?"  There are services online that will take a file you supply, digitize it, and send it back to you, for a fee, of course.  Given the price of the software, and the time it takes to learn it, this may be your best option unless you really intend to get into it!


If you want to turn cheap towels from the wholesale club into great gifts for any holiday,

finish a quilt fast and easy, with computer precision,

monograms everything you touch, to give as gifts or label as your own,

or create one of a kind garments, gifts, decorative accessories, and more, an embroidery machine will help you accomplish it in record time with professional looking results.

Stay tuned for my next post, which will include tips, tricks, and a lot more detail about the Janome 300E!


Friday, May 3, 2013

Select a Set of Perfect Sheets!

With all the time Miss Ginger spends in bed, she knows the importance of quality bed coverings!  After years in the retail sector, she's got some hints and tips for finding a great set of sheets that won't break the bank! 


While people tend to get mired down in thread counts and dimensions, the first consideration in choosing a luxurious sheet is the fiber. While "linens" is the term historically used to mean bed sheets, most sheets today are cotton. Linen sheets maintain a crisp, cool feel between washings, but are incredibly expensive, required detailed ironing after washing, and may be a little more "crisp" than most of us would enjoy.  Conversely, silk has a soft, smooth, almost slick feel, and is lightweight and durable. Silk contains cellular albumen,  and some believe that it promotes younger looking skin. Because of it's expense and delicate nature, silk is not a practical choice for most American homes. You are not likely to find linen or silk sheets at your local department or specialty stores, but they are available online.

Cotton, poly-cotton, and rayon-cotton blends are commonly available and come in a wide range of colors and thread counts. The most important consideration in choosing a cotton sheet is the type of cotton. Traditional American cotton is a short staple cotton, meaning the individual fibers are shorter than Egyptian cotton, the original long staple fiber. Longer fibers, created by nature through a cadence of moisture and temperature fluctuations during the growing season, give the final fabric a smoother hand and greater durability. Of course, good ole American ingenuity has created strains of long staple cotton that can be grown right here in the US of A, so you can't rely on country of origin labels alone. "Egyptian Cotton" is grown in Egypt, and, due to the climate there, will always be of high quality.  You can find sheets made of long staple cotton grown outside of Egypt, and it will typically be labelled "pima", "Supima®", or "long staple cotton".


You still with me? Now that you have chosen a fiber (long staple cotton, remember?) it's time to choose a fabric. (Home Ec 101:  fabrics are made of fiber. Fiber is the raw material, fabric is the finished product.) Most commonly in American stores you will find percale, sateen, and damask, specifically damask stripe, which is an alternation of a sateen weave. Confused? Don't be, as these terms are not super important. Percale is typically a bit "crisper" than sateen, for those who like a more linen-like sleeping experience. Sateen is a bit "softer", for those who like the feel of silk and the practicality of cotton. 80% of the sheets you see in a store will be sateen.

Now... lets talk about the ubiquitous thread count... it will be emblazoned all over the package! Woven from Egyptian or pima cotton, any thread count from about 400 and higher will feel much the same, although logic might say that the higher thread count would wear better.  In a percale, a higher thread count would give a somewhat smoother feel, more like a sateen. And in a sateen, a higher thread count makes the fabric feel more like silk.


So, now that you are totally confused, should you buy a set, or individual sheets and cases? Were you really expecting an easy answer to that?

Sheet sets are often promotional in nature, meaning they can represent a great value... emphasis on the word "can". They can also be a loss-leader, bait and switch way to get you to make an impulsive purchase, so caveat emptor! Keep what you know in mind, and make an informed decision!


If cost were no object, I would always buy 800 thread count Egyptian Cotton "Hotel Collection" sheets from Macy's. They are luxurious, long-wearing, and look great right out of the dryer.  At retail, they cost about $800 a set for a king size bed with 4 pillows.  At 25% off they are still about $600 a set, and if you can catch them on sale, with a coupon, you can get them for about $540.  They are the "gold standard" for sheets, IMHO.  

The other great advantages to buying sheets individually vs. as a set are two-fold. All sheets are packaged with a number of fillers and additives to make them feel great at the store. If you are considering an expensive line, it might be a good idea to buy a set of pillowcases, take them home and launder them, and then sleep on them for a night or two to see if you want a whole bed made of that.... and it's always great to have a couple of spare pillowcases around, anyway.  The other good reason to buy "open stock" is that it tends to be available in the store for a much longer time than promotional sets, so if bleach damage and pillowcase loss is a common occurrence in your household, you can replace only the pieces you need to complete the set. 

If $800 for a set of sheets is a bit rich for your blood,  sheet sets can provide a real value, if they meet your needs.  Sets are promotional, which means a store will "stack them deep and sell them cheap" for a specific sale event, and when they are sold out, they are gone. There is no replacing individual pieces after an unexpected bleach accident, but they can be a great deal if they are made of a long staple cotton, fit your bed (especially if you have a deep mattress) and come in a color that works with your room.


One of the best values Miss Ginger has found is a 600 TC Egyptian Cotton sateen extended set (it has 4 pillowcases!) for $70 bucks or so. While the brand name and the stitching detail may vary by store, she has found this same general offer at Sam's Club, Costco, and Tuesday Morning. She's even found them at Macy's, and though the ticket price may be a bit higher, with a sale and a coupon they can actually get at low as fifty bucks and some change.  

Miss Ginger may not be able to change the quality of your life, but she may be able to upgrade the quality of your sheets.... and if you are handsome and rich, she might be able to enhance the quality of what's between them! You know where to find her... in the comments section, below!!!

Thursday, May 2, 2013

Between the Sheets!

Miss Ginger spends a lot of time between the sheets... and she's not ashamed to admit it! Unfortunately, she spends most of that time sleeping, and the rest snuggling with Princess Shelby, so get your minds out of the gutter!!

Momma Ginger was a fanatic about sheets,so Miss Ginger learned a lot about them from her. Momma G once told her "Ginger dear, you probably won't grow up to be much of a looker, so you'd better learn to keep a spotless house if you ever want a man!"  Well, jokes on her-  'cause I'm a knockout, I don't WANT a man, and my house is immaculate! 

Momma G was a white sheet gal- only white sheets, always washed in bleach.  5 boys at different stages of puberty... bleachability was a high priority for her! Miss Ginger, not so much! But she and Shelby appreciate the sanctity of "clean sheet night", and look forward to it every week!

One of the best things Momma G taught Miss Ginger is how to fold a fitted sheet. Can you do it?  Let's see if you are doing it right!  (Sidenote: do you know how hard it is to fold a sheet and take pictures of yourself doing it?!) Anyho, you start with a mess like this, fresh out of the dryer ("Don't let them sit in the dryer", says Momma G. "If you do, you'll never get those wrinkles out!"
Now, here's the fun part:  locate one corner, and hang the sheet over your left fist by that corner, like this:
Now, follow the edge of the sheet down from your fist to the next corner.  Put your right fist on the outside of that corner, and turn it inside-out as you bring your hands together. Once it is inside out, nest it inside the first corner.  Do this 2 more times, and if you do it right, it will look like this:
Now I'm going to lay it out on the dining room table so I can take pictures.  You may be able to do this part without laying it out, but really, it's so much easier to lay it on the bed or a table at this point....
Now, take the edge closest to you, and fold it up, lining up the straight edge on the right side (and concealing the messy left side within the fold!) Now, grab the far side and flip it over, placing the folded edge away from you. This brings this squarest side to the bottom.
Smooth everything out as best you can (no need to be OCD at this point) and fold it toward the middle, in thirds.
Fold the right third over the other two, making a nice, neat package.
Fold it one more time away from you, and you're done!  Nice and neat, ready to stack in your linen closet!
I've got lots more "sheet shit" coming your way, so stay tuned!

LinkWithin

Related Posts with Thumbnails