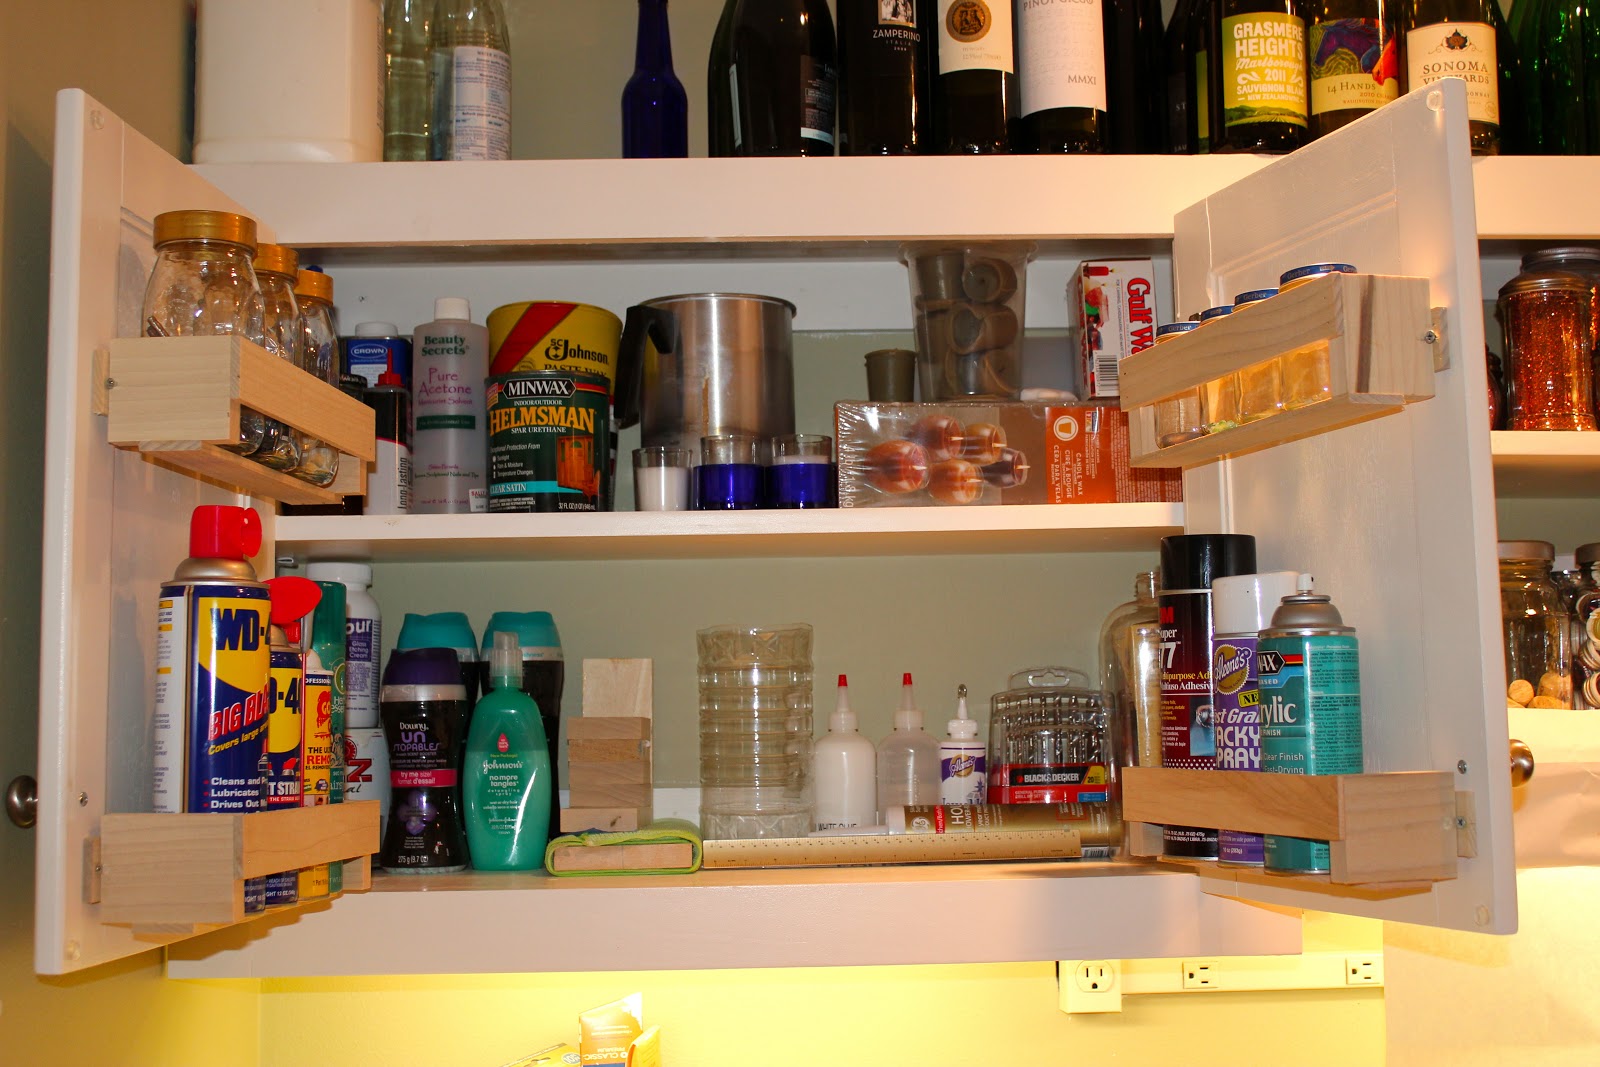
Do you have one of those "fear for your life" cabinets in your kitchen or utility room? You know, the one you are scared to open, because you are afraid something will fall on your head and kill you?
Here's a quick and easy way to get it under control, adhering to Miss G priorities in life: quick, cheap and easy! And the answer is right in front of your face! Use the back of your cabinet doors!
Your local home center sells wire racks that screw right onto the back of the door, holding your most used items right up front, ready to grab and go. Here, Miss Ginger has added racks for her bottles of oils and vinegars she uses most while cooking, easy to grab at the left of her cooktop. These racks came from Lowe's , cost less than 8 bucks each, and install in minutes with just 2 screws. They work great on the back of a 12" door, but what if your door is wider or narrower than that? Or what if you have odd-sized bottles and cans you need to stash?
It's easy to make a wooden rack from 5 pieces of wood, and you can create them to fit any door, as well as any size jar or product you need to store! Here, Miss Ginger wrangled all of her most used spices into racks that are a perfect fit for their little bottles.
It really is easy to do! All you need are 1x3 and 1/4 x 2 craft boards, which come in 2' and 4' lengths at Lowe's, so they are very lightweight and easy to handle. The only tools you will need are a hammer and a saw, plus a few small finishing nails and a couple of screws for mounting. A battery operated drill makes installation easier, but isn't essential- a screwdriver will do.
Begin by measuring the back of your cabinet door. If you have paneled doors like these, with a thin wood panel in the center, be sure to measure from the thick part on the left to the thick part on the right. This door measures 12 1/2", so that will be the length of the back slat. Cut this piece from the thin craft board, and cut 2 more pieces 1/2 inch shorter.
Due to Miss Ginger's poor planning of the photograph, you can't see that the board in the back is actually 1/2" longer than the 2 in front. To cut the 2 side pieces from the thicker board, measure the diameter of the cans or bottles you are planning to store, and cut the sides to that length. That's it, you're done cutting! 5 easy pieces!
To assemble the rack, use small finishing nails or brads to nail one of the shorter pieces to the sides, on the edge that doesn't match your jar measurement. Nail it flush to the top, as shown here, to form the front of your rack. Miss Ginger usually puts a dab of white glue between the boards before she nails, just to make sure it's nice and solid.
Rotate the rack forward, and nail the other short strip across the bottom, on the side that matches your jar measurement. Nail it in the center; just eyeball it- no need to be anal!
Finally, rotate one more time, and nail the longer piece across the back, centered. On each side, drill a small mounting hole through the "overhang".
There it is, ready to mount and round up your junk! You can paint or stain it to match your cabinets, or just leave it plain. Miss G left these in the craft room plain, to save time, but the ones in the kitchen are stained and sealed because that seemed more kitcheny.
Installing is easy, too- just screw it! Seriously, just 2 screws into the holes you drilled! Just one little caveat about installation- watch your clearance!
Be sure to install your rack high enough to clear the shelf beneath it, and low enough for the tallest can you will store to clear the shelf above it. Here, you can see the top rack clears the shelf, and the lower rack is low enough for the can to clear the shelf, as well.
So remember that nasty cabinet at the beginning of the post? Here it is, all cleaned up, with the spray products Miss Ginger uses most within handy reach of her work area, and all the little bits and pieces that were all over the place corralled into storage jars on the top racks!
At the other end of the workbench, she has her glass paints, in a rack custom-made to the size of the tubes! These would rattle around and fall out of a wire rack because they are so little, but here, they are held snuggly by a rack perfectly matched to their size!
And really, folks, it has taken her longer to write this blog post than it took to make those racks! Even someone who is awkward with tools could pull this off, so Miss G is sure you can do it!
Leave a note in the comments and let Miss Ginger know what you are having problems trying to store! Who knows, she may have just the answer for you!


2 comments:
Dayum!
You're good!
I need some of those in-door racks, but I think I'll opt for the Lowes version rather than tackle the build 'em myself method!
You are amazing! You could have your own show on TV for organizing and decorating and sewing and cooking and all things Martha Stewart!! As it is, you have this blog for all that!! :-)
Post a Comment